
Amazon Connect CCP Integration: Agent AI Voice
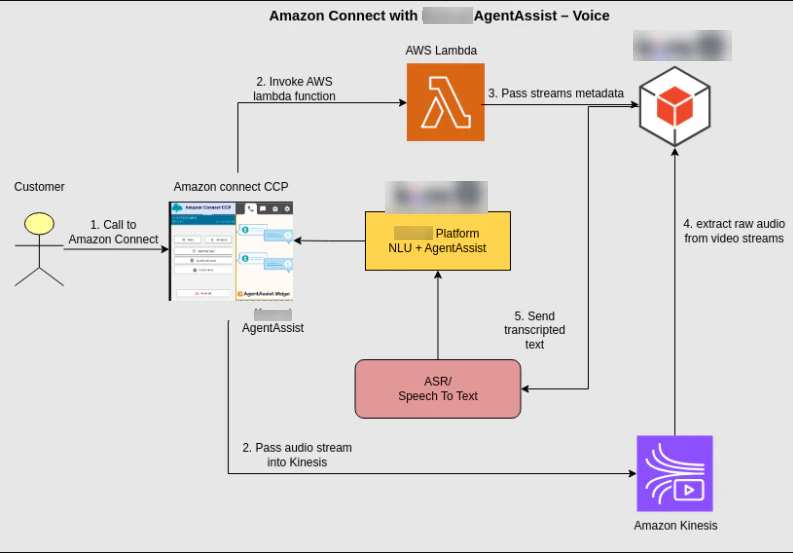
This document describes integrating Amazon Connect with Agent AI—Voice using the AWS CCP Integration approach. Amazon Connect receives voice calls while Agent AI provides real-time support to agents. Audio streams from both the user and agent are captured and processed using Amazon Kinesis Streams. AWS Lambda functions manage transcription and token generation. Agent AI provides AI-powered assistance, including Agentic Copilot, Next Best Action, Agent Coaching, Agent Playbook, sentiment analysis, EOC Summary, and more throughout the conversation.High-Level Architecture
Prerequisites
| Category | Requirement |
|---|---|
| AWS / Amazon Connect | - An Amazon Connect instance with Administrator privileges. - The instance should be in a region that supports the required services, such as Kinesis Video Streams and Lambda. - If using Telephony: claimed phone numbers (DID or toll-free) as needed. |
| Contact Control Panel (CCP) / Agent Desktop | - Supported browser for agents (latest version of Chrome recommended; Firefox may have limitations around sample rates and media usage). Refer to the AWS Documentation for details. - Workstations meeting minimum hardware/network standards (CPU, RAM, network bandwidth). Refer to the AWS Documentation for details. - Network/firewall settings configured: allow outbound HTTPS (443), WebRTC ports/domains, approved origins/domains in Connect for CCP, and any custom hosting of CCP. Refer to the AWS Documentation for details. |
| Streaming and Transcription Components | - Amazon Kinesis Video Streams (KVS) availability in region: permissions to create/stream video/audio data. - AWS Lambda permissions to read from KVS, generate temporary AWS credentials for access, and trigger downstream processing such as the transcriber bot. - Bot/webhook configuration to receive transcription/context. - SSL/valid certificates for any custom-hosted CCP or widget, if hosted outside Amazon Connect’s domain. |
| Components | - Active Agent AI account with necessary roles/permissions for dialog tasks, webhook endpoints, and transcription configuration. - Familiarity with dialog/task definitions and handling real-time input. |
| Security / Identity | - Identity management in Amazon Connect / AWS IAM roles for Lambda and KVS. - Approved origins configured for web apps (for custom CCP or embedded widget) in Amazon Connect. - Appropriate policies for least-privilege on AWS services used. |
| Migration / Versioning | - If accounts were using AudioSockets, migrate to Voice Gateway. - Verify version compatibility of the custom CCP or Streams API when making customizations. |
Components Required
The following components are required:- Agent AI
- AWS Lambda
- Amazon Kinesis Streams
- Amazon Connect
Pricing and Cost Considerations
When integrating Agent AI with Amazon Connect, consider potential AWS costs such as call usage (per-minute), phone number rental, Lambda executions, Kinesis Streams (ingestion/storage), transcription services, data storage/transfer, and regional telephony rates. Actual costs vary by usage and region.Setup Guide
Agent AI
To onboard the Agent AI account and create dialog tasks, refer to the About Agent AI doc.AWS Lambda
Function 1: KVS Trigger (Choose any other name)
This function retrieves call stream metadata and AWS credentials from the environment, generates a credential set (SessionToken, AccessKeyId, SecretAccessKey) for KVS access, and triggers the Transcriber to send transcripts to the AI Agent with the current Conversation ID.- Download the Lambda from here and upload it to the function you create.
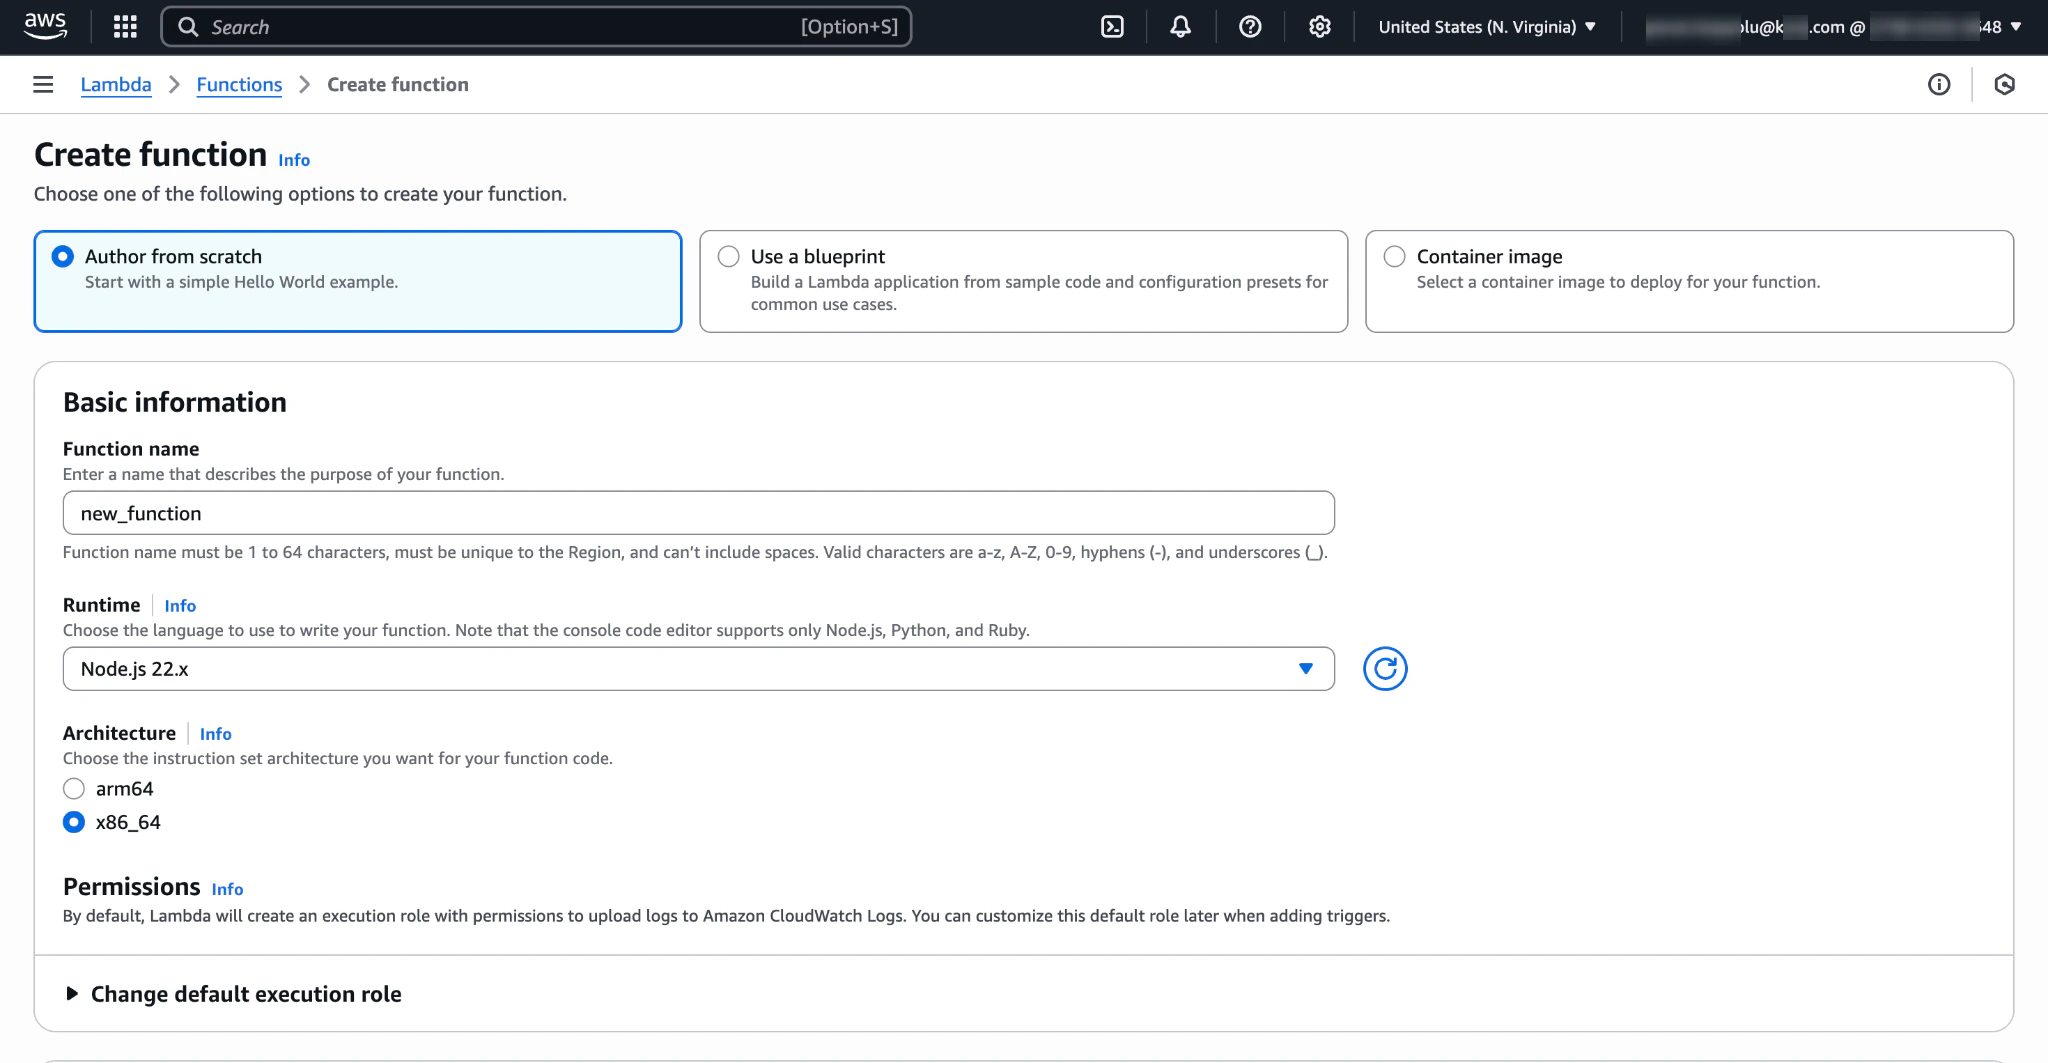
- Go to Create function.
-
Enter a name in the Function name field.
-
Go to Upload from.
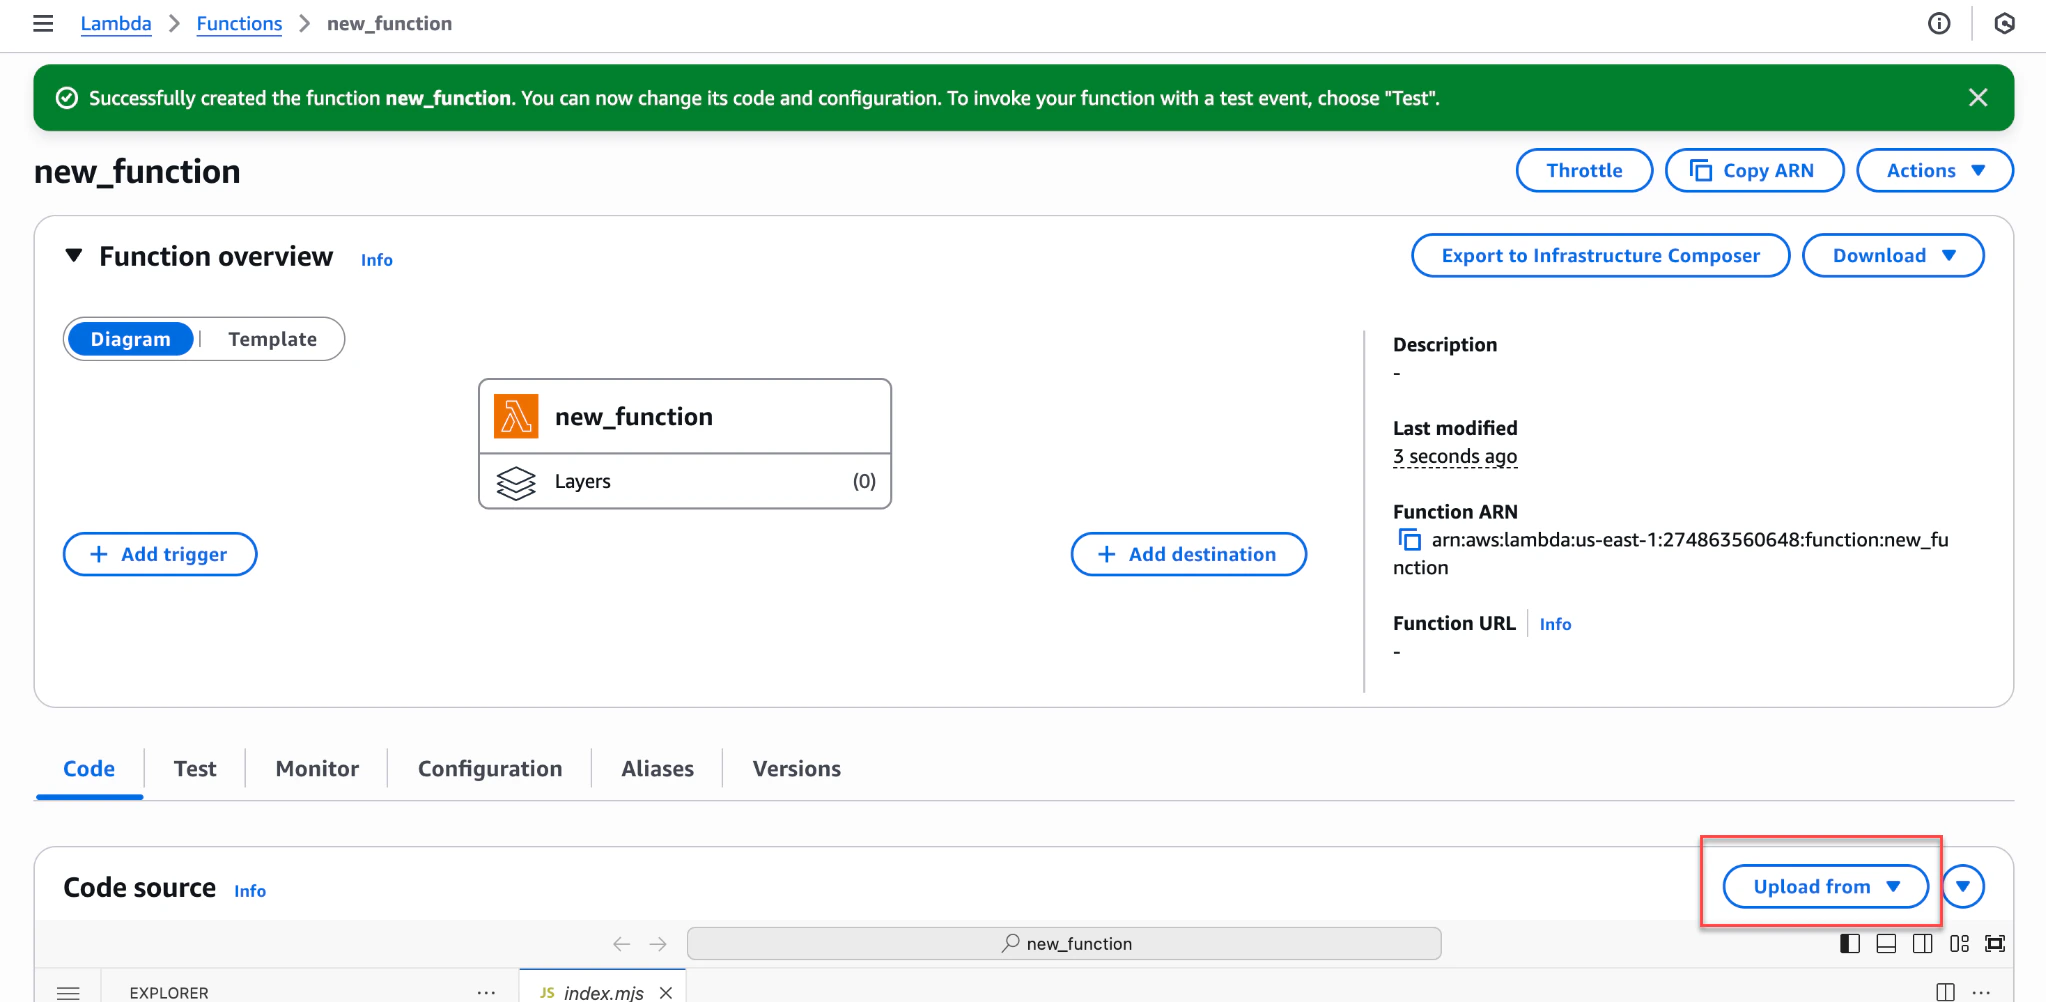
- Upload the Lambda zipped file.
- Click Save.
- Go to Runtime settings.
- Click Edit and change the Handler name from index.handler to kvs_trigger.handler.

-
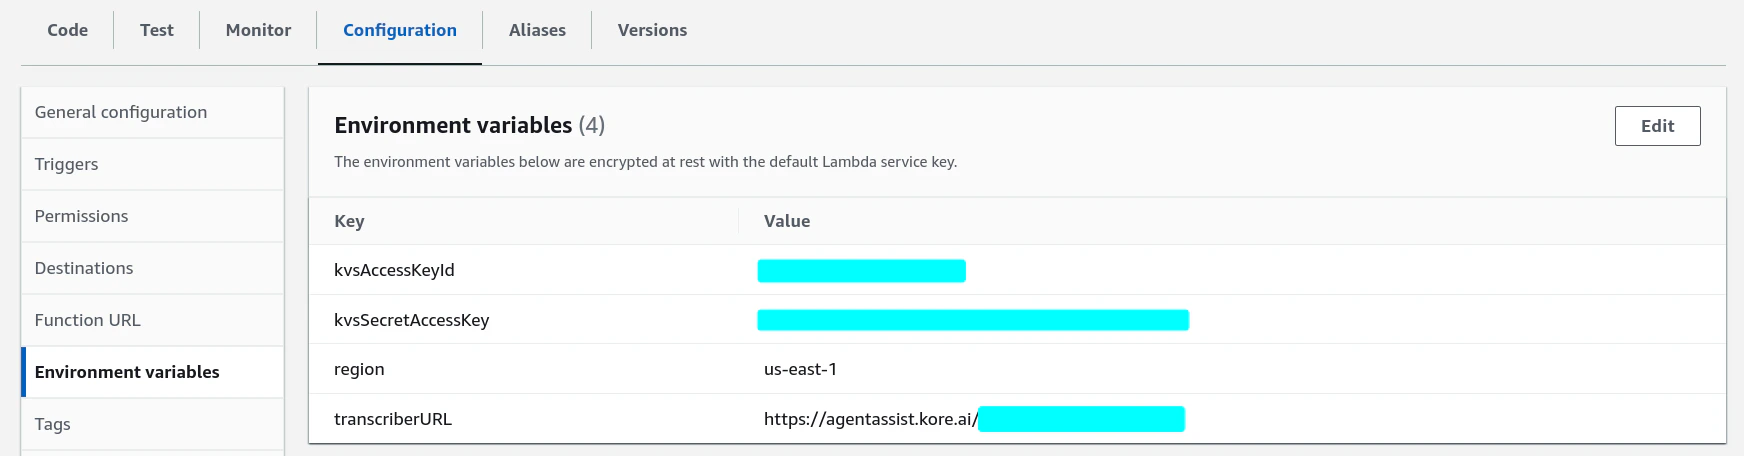
Go to Configuration > Environment variables.
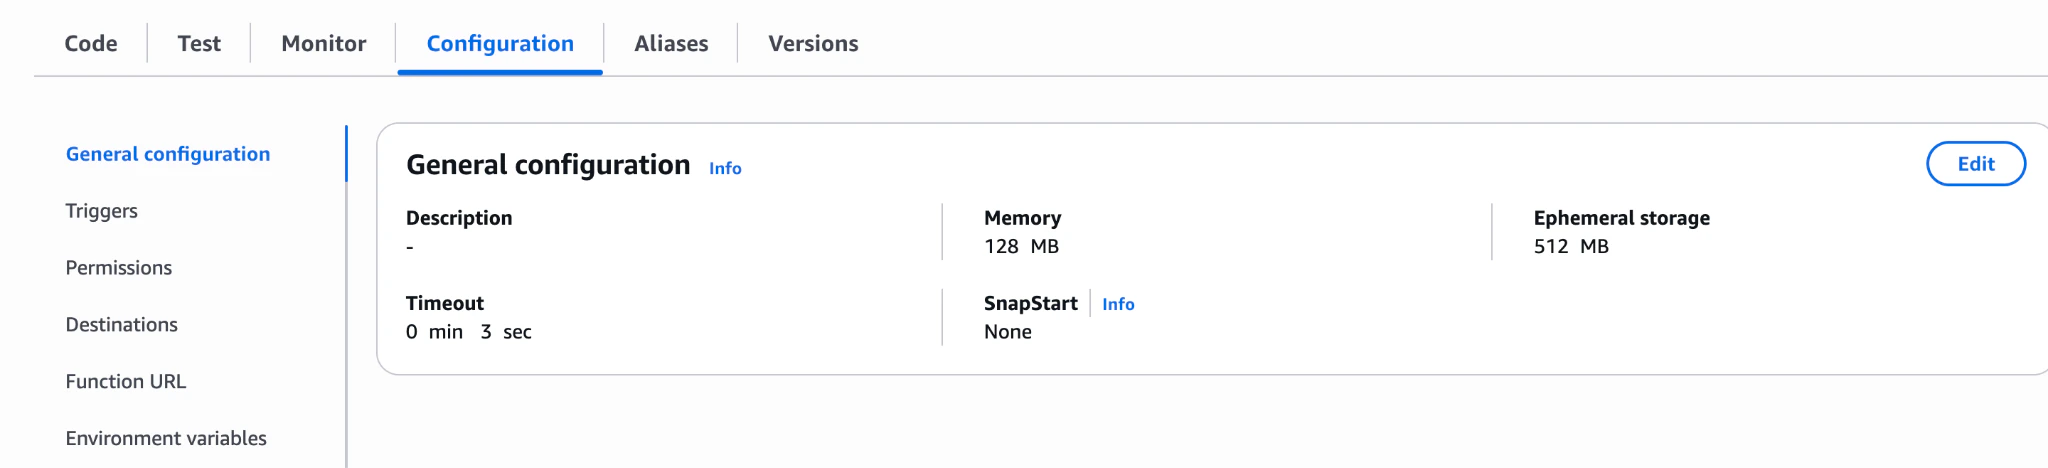
-
Create the following environment variables in the Lambda:
- kvsAccessKeyId – AWS Client ID
- kvsSecretAccessKey – AWS Client Secret
- region – your AWS Region
- transcriberURL – https://platform.kore.ai/integrations/amzn/voice/
- For regions other than US-prod, replace the above domain with your Agent AI domain.
-
Steps to get the AWS Client ID and Secret
- Ensure the account associated with the AWS Client ID and Secret has Read permissions to Amazon KVS Kinesis Streams.
- Get your AWS Client ID and Secret from IAM:
- Go to IAM > Users.
- Click Users > Security credentials tab.
- Click Create access key.
- Select Use case as Application running on an AWS compute service.
- Click Next.
- Enter a description tag, then click Create access key.

-
The final configuration appears as shown:
Function 2: Retrieve Agent AI Widget Credentials
This function returns all credentials required to render the Agent AI widget on the Amazon Connect desktop. Store all required data in environment variables and expose them via the API Gateway URL, which is used later in the CCP-voice configuration page.- Download the Lambda from here and upload it to a new Lambda function.
-
Environment variable list:
- agentassistUrl:
https://agentassist.kore.ai/koreagentassist-sdk-v3/UI/agentassist-iframe.html - botId: [Agent AI Bot Id]
- clientId: [Agent AI Client Id]
- clientSecret: [Agent AI Client Secret]
- languageCode: en
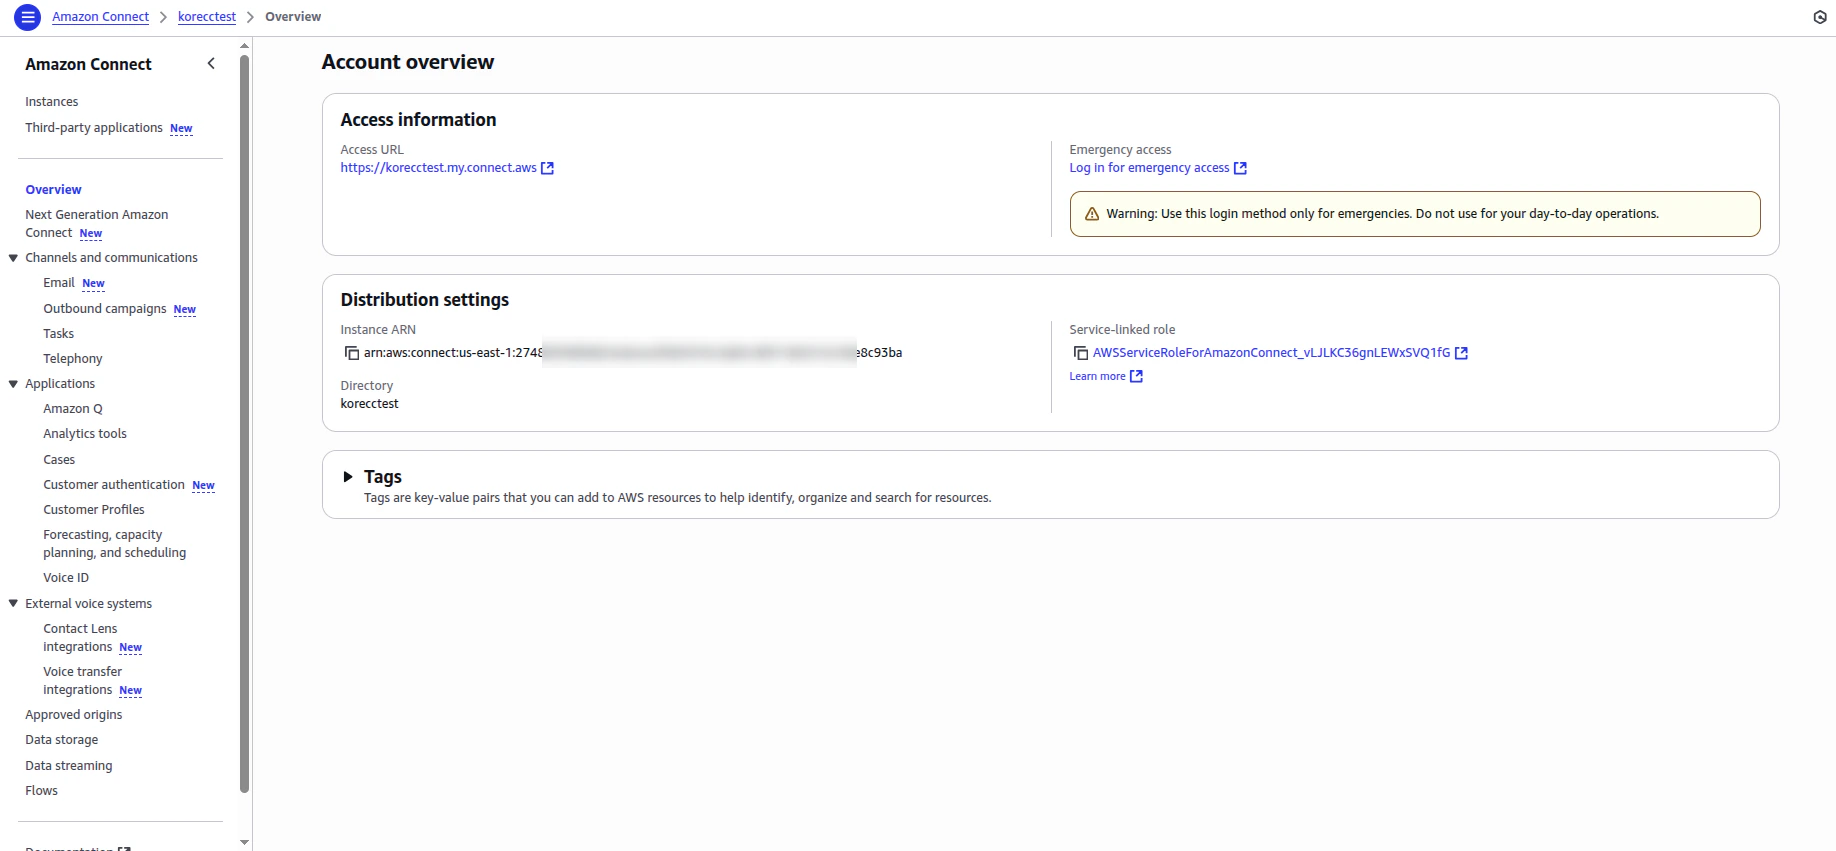
- awsConnectURL: [Aws Connect Access URL]/connect/ccp-v2/
- agentassistUrl:
-
Add an API Gateway to access this Lambda:
- Go to Configuration > Triggers.
- Click Add trigger.
- Select API Gateway.
-
Select Create a new API. (API Type: HTTP API)

- Copy this API endpoint URL and paste it in the URL field of the Contact Control Panel as Agent Desktop section.
Amazon Connect
- Sign in to your Amazon Connect instance.
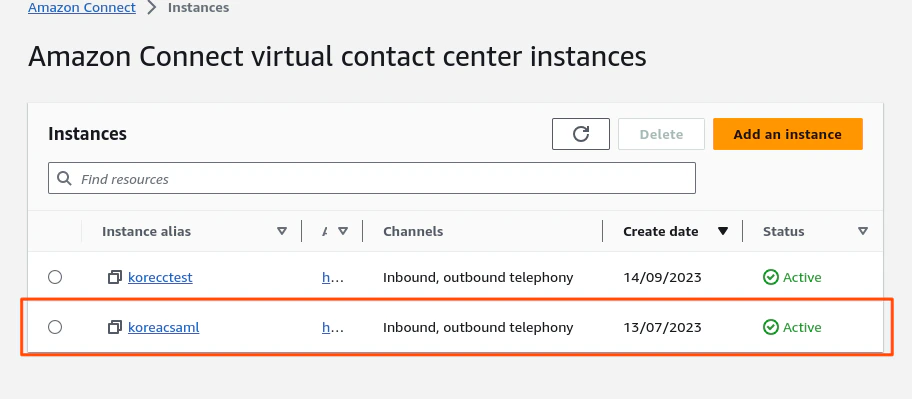
- Go to Amazon Connect > Instances.
-
Create a new Amazon Connect instance or sign in to an existing one.
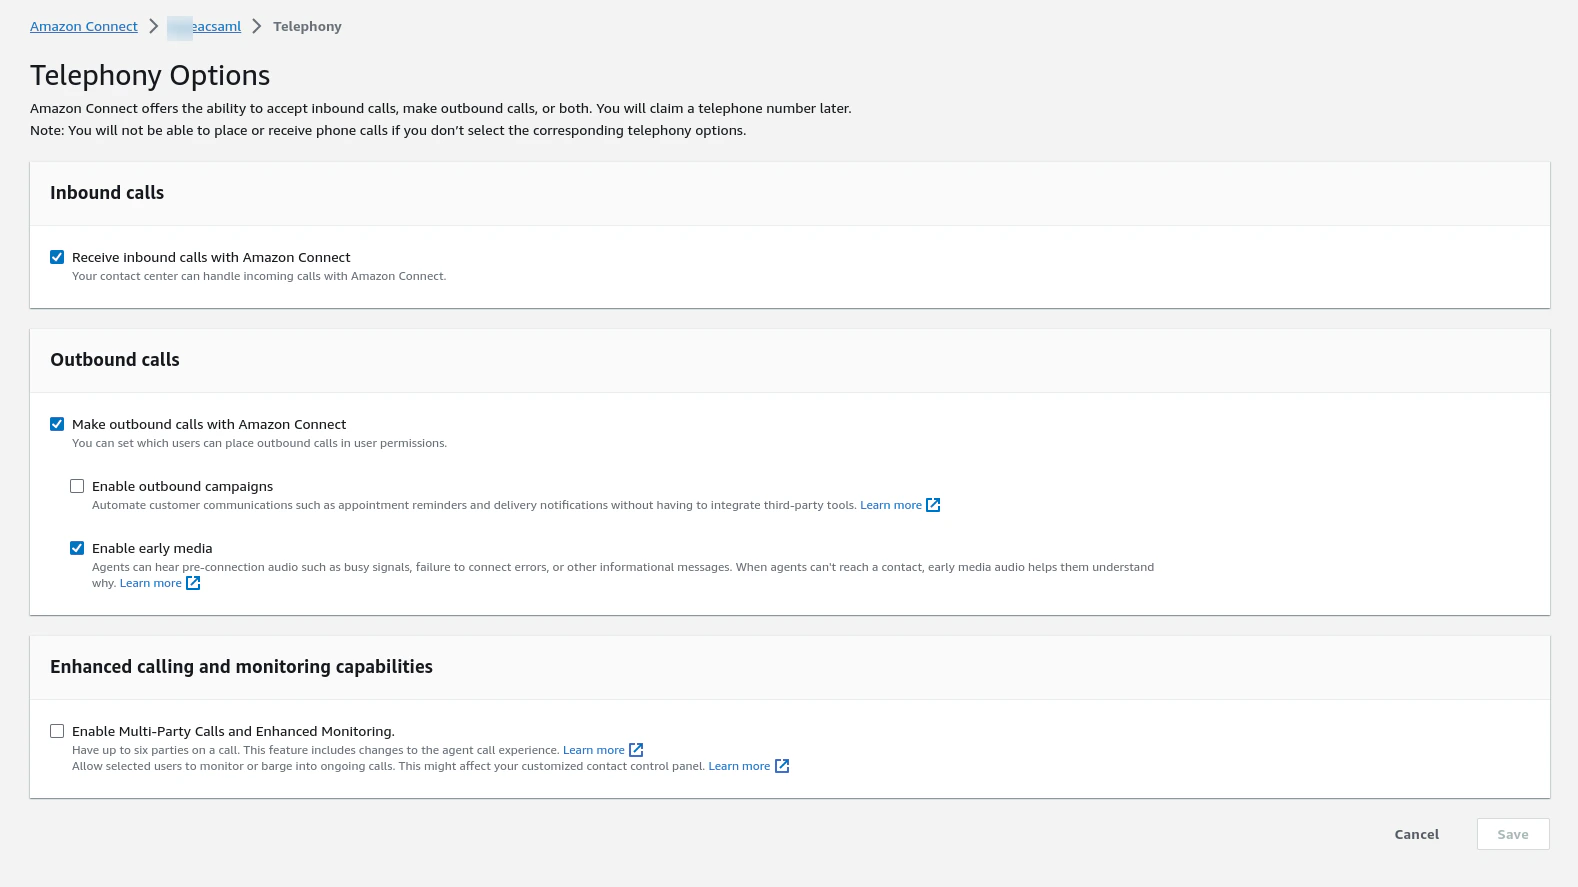
-
Enable all required options under the Telephony Options section.
-
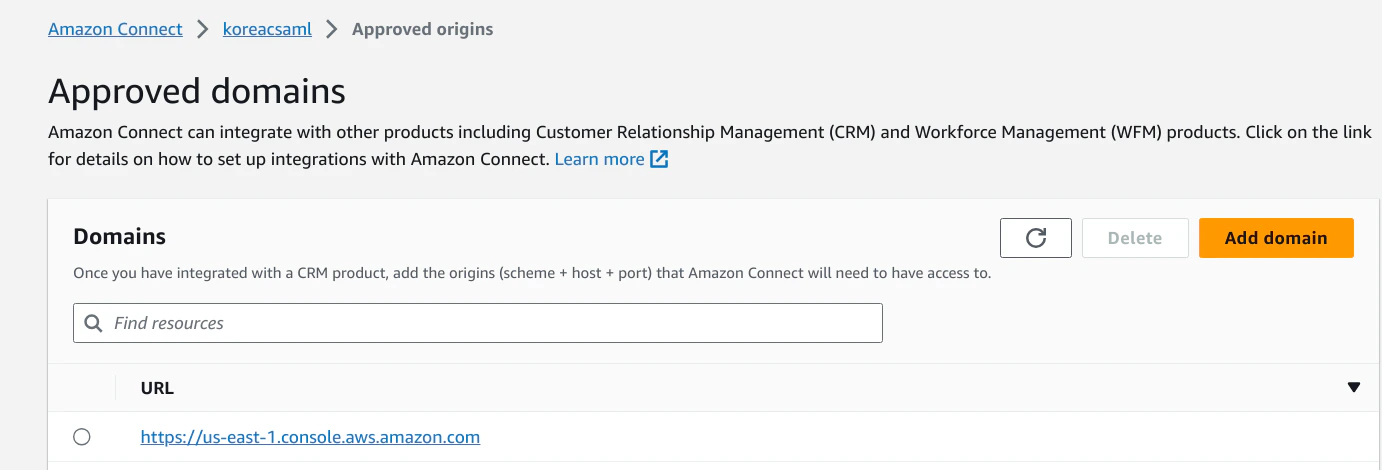
Go to Approved origins, and add the domain(s) where you have hosted your CCP instance(s).
-
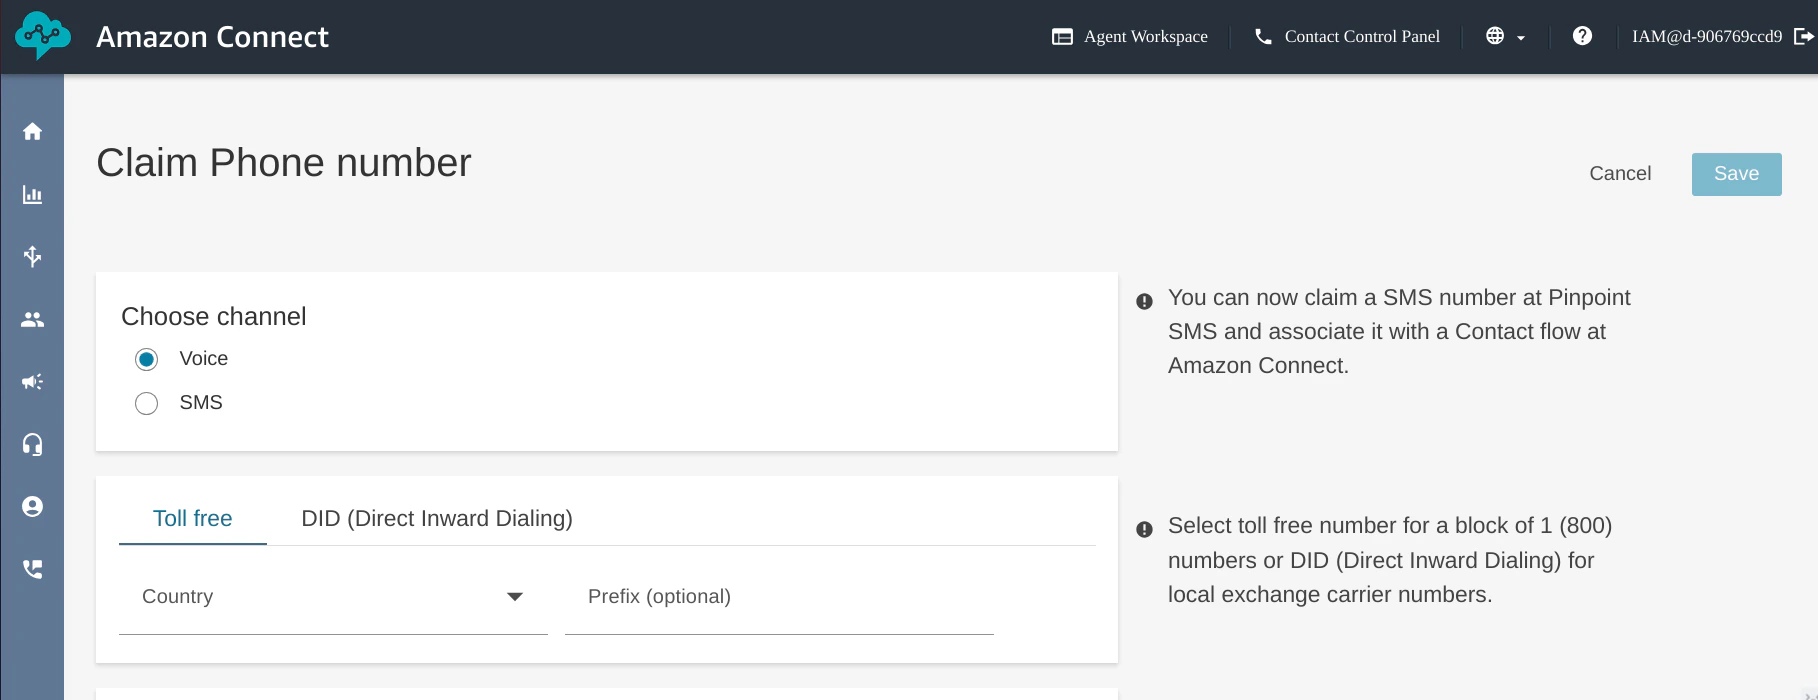
Purchase/claim a phone number from Amazon Connect. Use this guide for reference.
-
Create or import a contact flow in the Amazon Connect instance. Refer to this article for help.
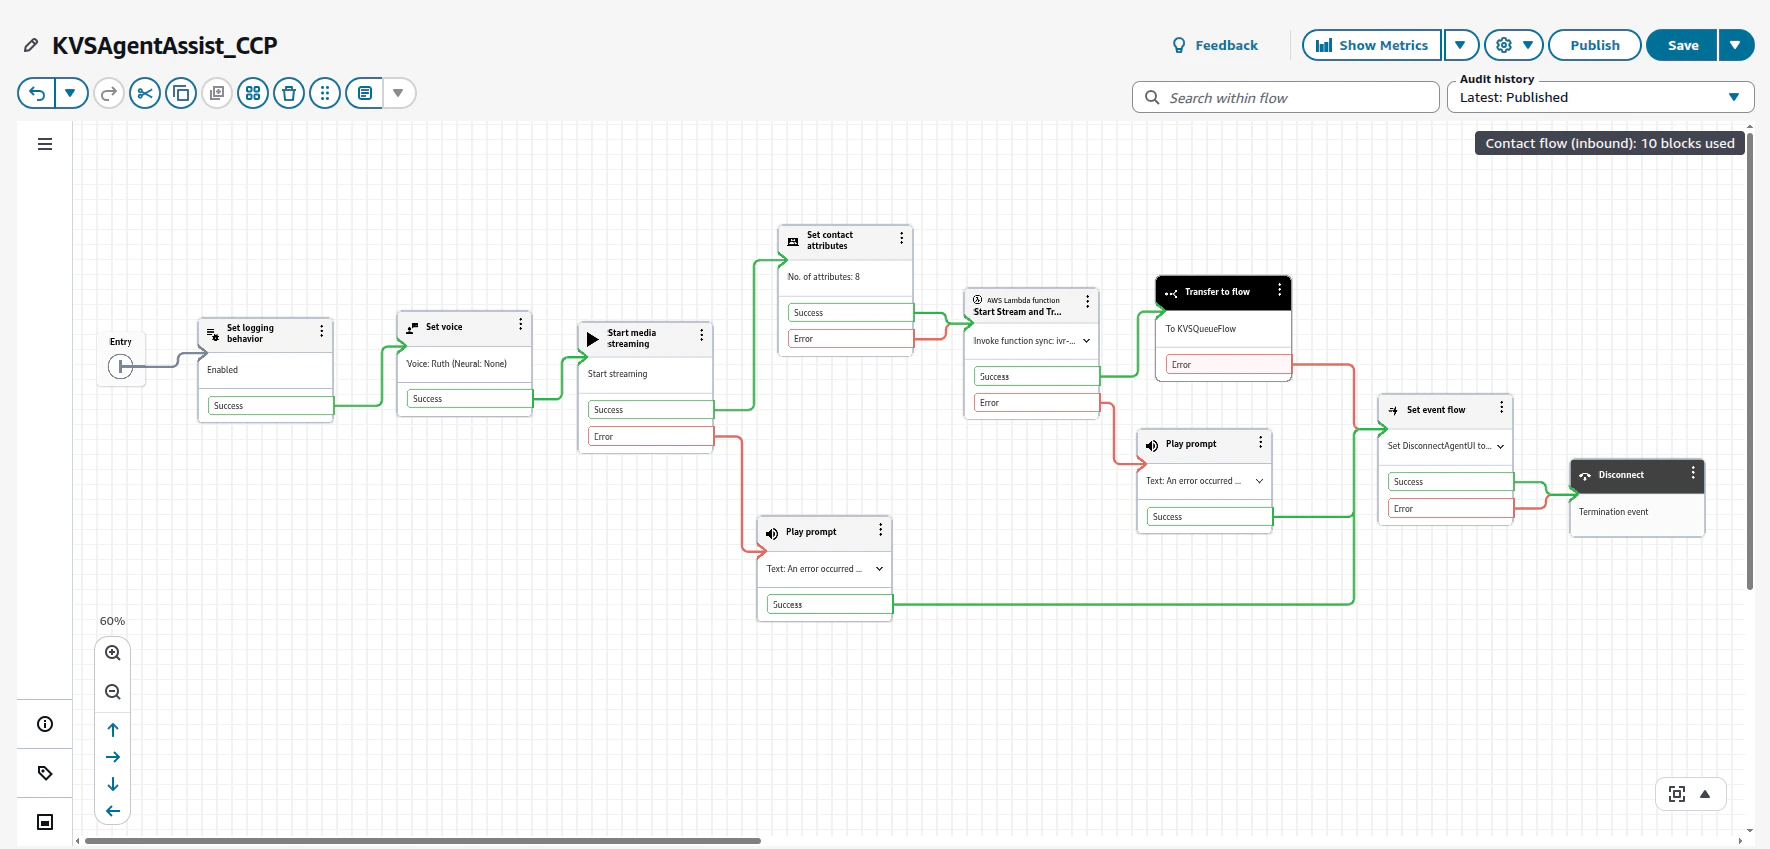
- Import the contact flow from this link.
-
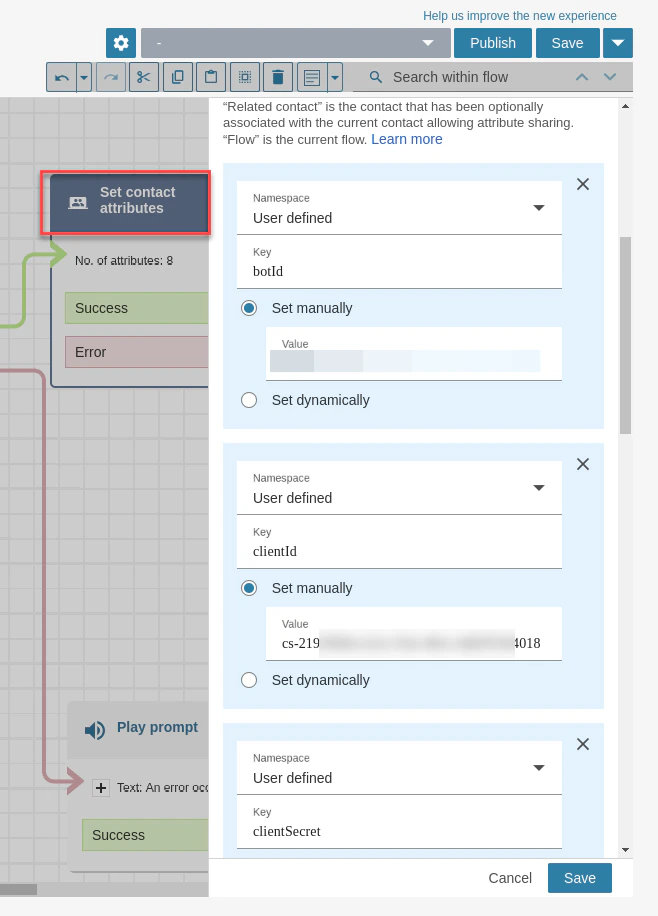
Click Set contact attributes, and enter the required fields:
- BotID: Your Agent AI Bot ID.
- ClientId: Your Agent AI Client ID.
- ClientSecret: Your Agent AI Client Secret.
- SipUri: Add
sip:XXXX@savg-us-prod-sbc-in-nlb-0d9a4c651955ff47.elb.us-east-1.amazonaws.comand replace XXXX with your SIPREC Configuration of Agent AI.
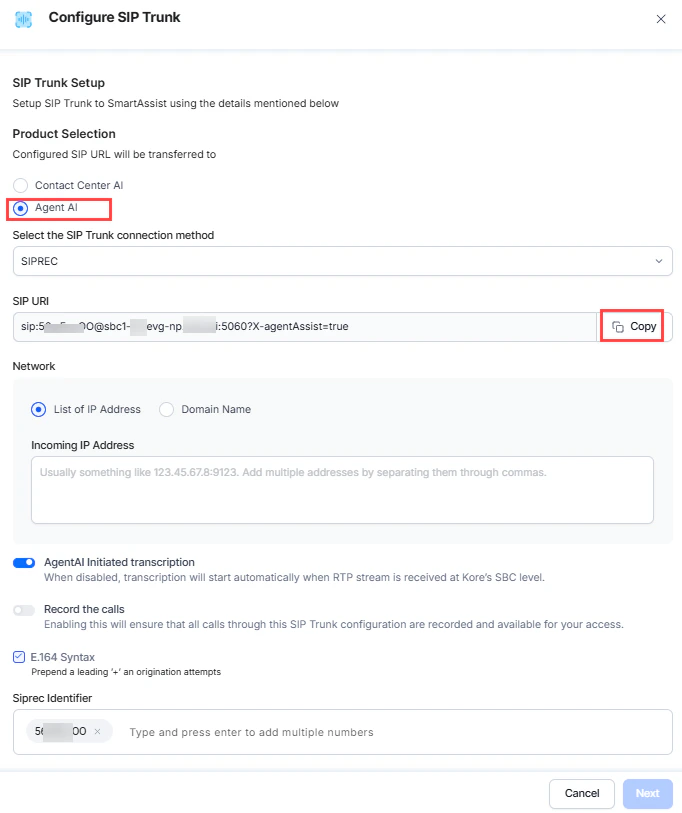
- Go to Agent AI > Flows & Channels, and click Voice Gateway.
- Click SIP Numbers > Configure SIP Trunk.
- On the Configure SIP Trunk page, in the Product Selection section, select Agent AI.
-
Click the Copy button next to the SIP URI field.
- Paste the copied SIP URI value into the contact attributes sipUri field in the Amazon Connect flow.
- agentassistUrl: Your Agent AI URL.
- wssUrl: Add “wss://savg-webserver.kore.ai”.
- accountId: Your Agent AI Account ID.
-
languageCode: Add “en”.
- Click Save.
-
Click Start Stream and Transcription in Kore Lambda.
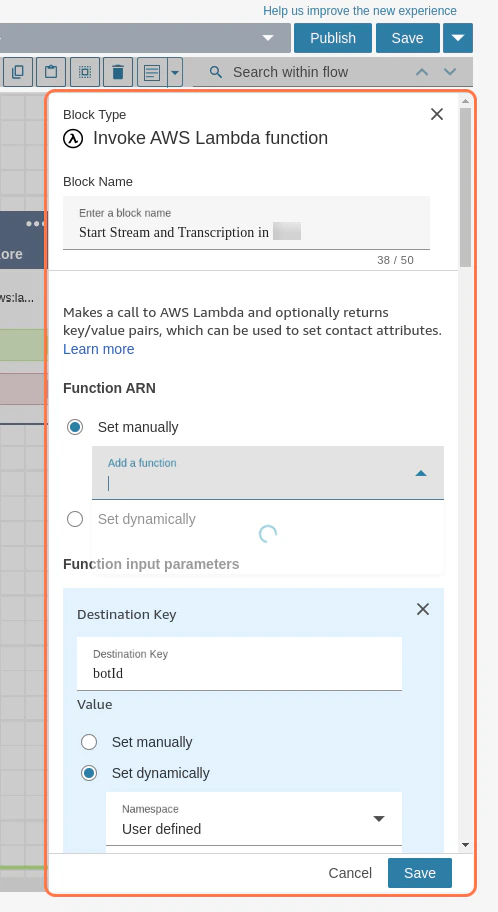
- Select your Trigger Lambda Function from the dropdown list, and select the first function created in the initial step.
- Click Save.
- For Transfer to Flow, select a flow to route the user to. For example, save KVSQueueFlow.json in a file, import this flow to Flows, and add Queue details for routing.
-
To use agent dispositions, configure the Set Event Flow block with Disconnect flow for Agent UI hook by importing this flow and selecting it. If not, delete the block and connect the remaining blocks to the disconnect block.
Note: The disposition saving logic is at your discretion. Implement as per your use case.
- Click Save and publish the flow.
-
Attach the contact flow to the purchased phone number. Refer to Attach a claimed or ported phone number to a flow for help.
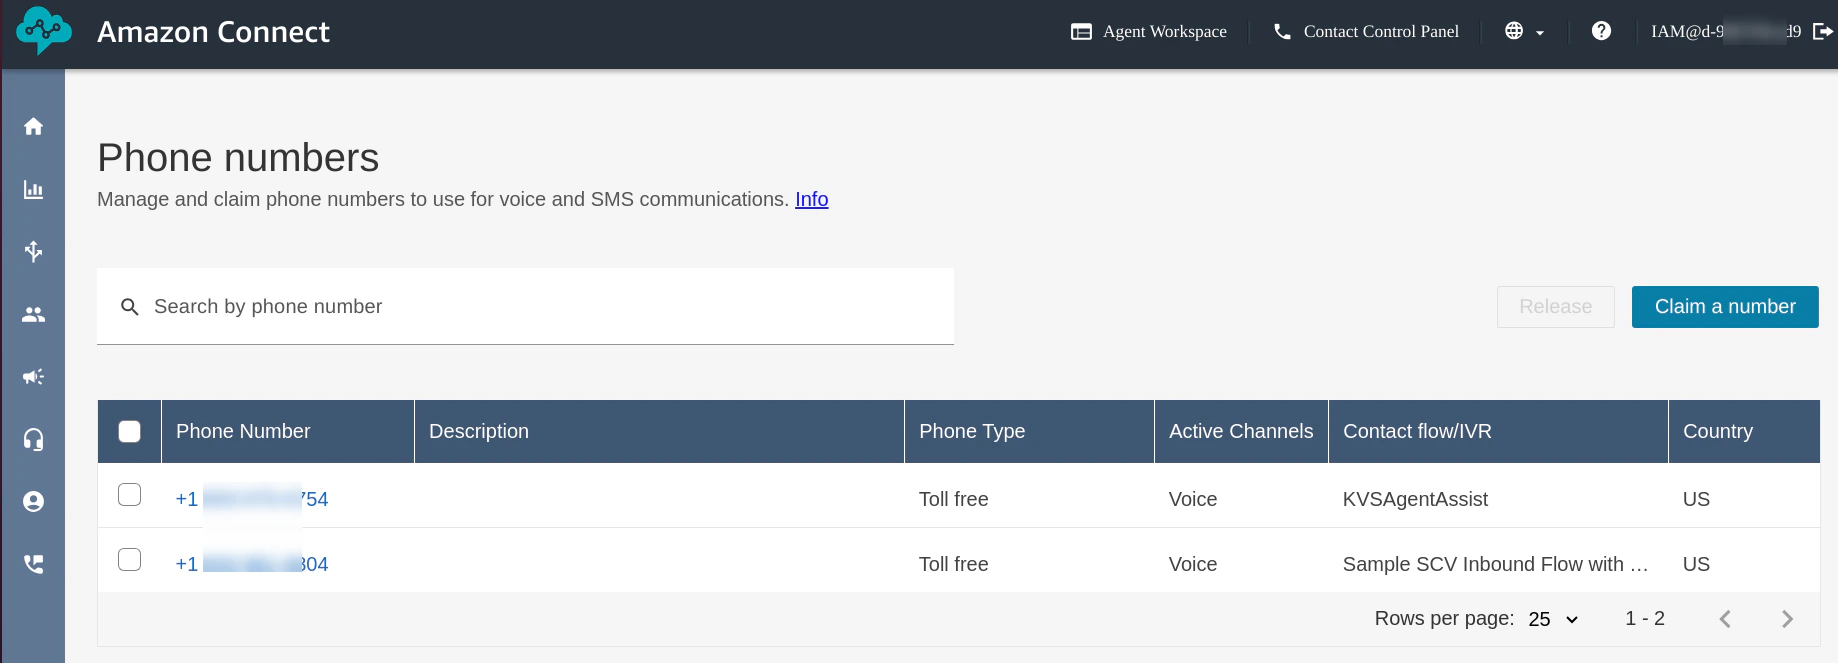
- Use the phone number to test the Amazon Connect CCP solutions with the Agent AI widget.
Contact Control Panel (CCP) as Agent Desktop
- The CCP solution is hosted at https://agentassist.kore.ai/integrations/amzn/ccp-voice/. Use this URL to load your Amazon Connect instance and Agent AI on the same page.
- First-time users are redirected to the configure page, where they must paste the copied API Gateway URL.
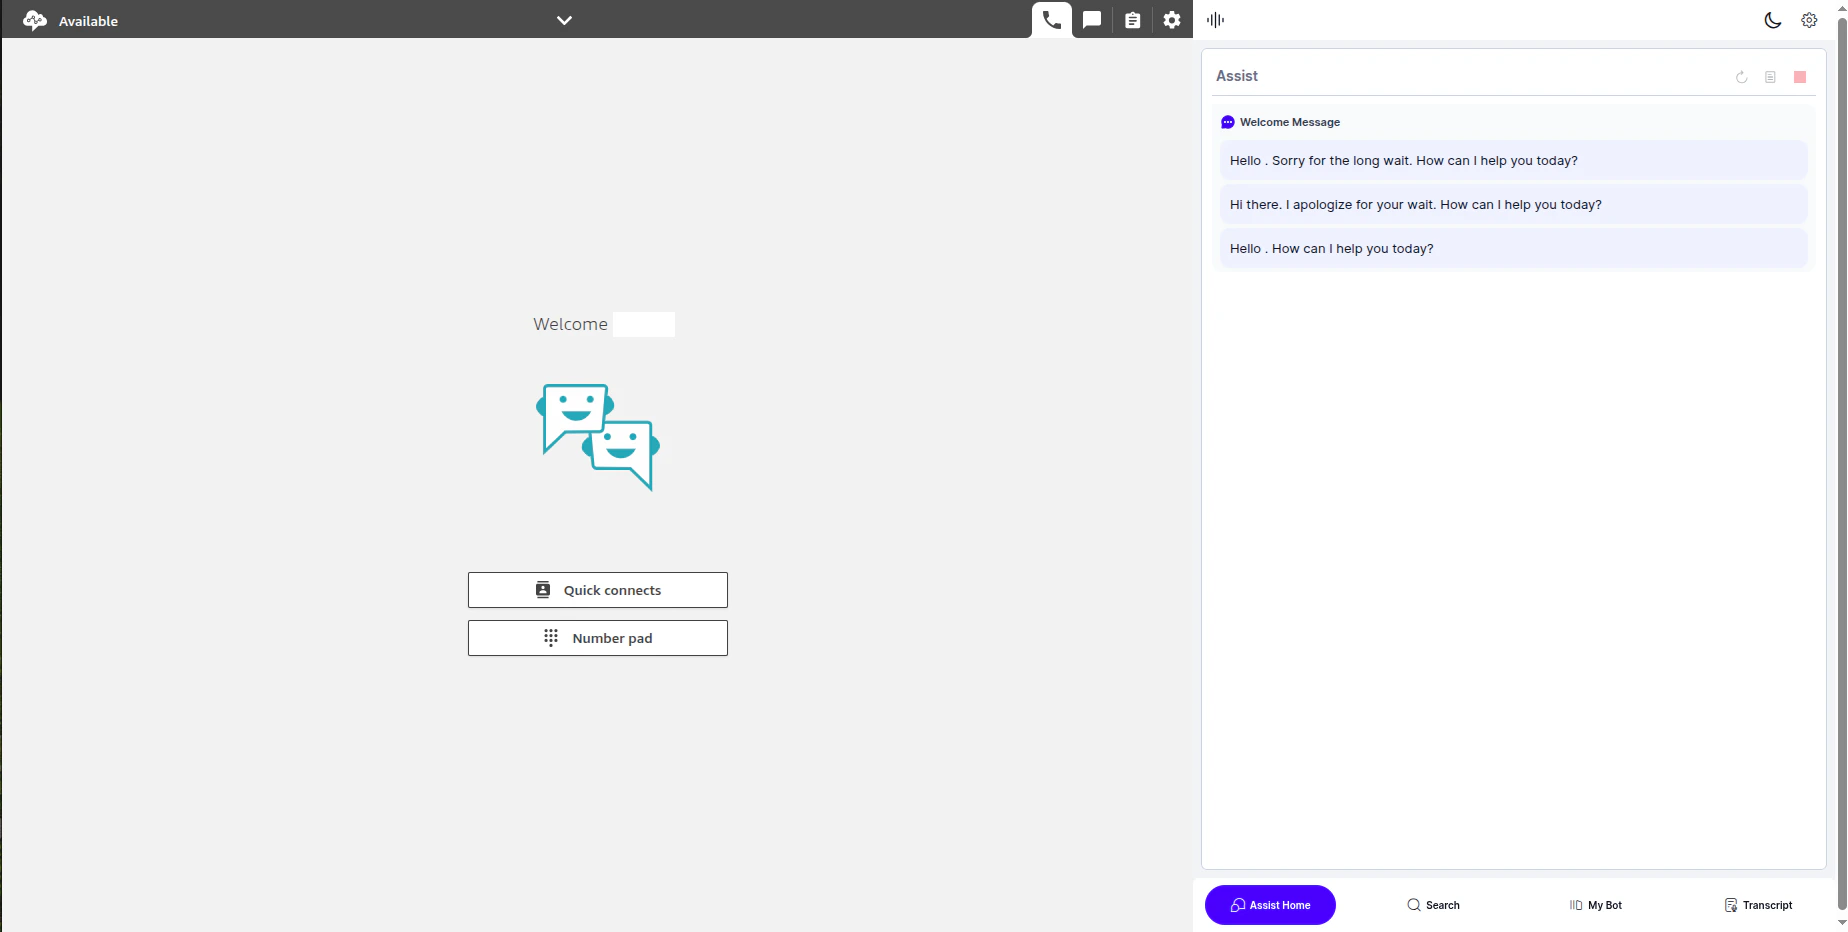
- After pasting the URL and clicking SAVE DETAILS, you are redirected to the CCP screen and a dummy Agent AI widget loads. Sign in with your Amazon Connect credentials to make the Amazon Connect CCP visible.
- Amazon Connect Contact Control Panel is used as the Agent Desktop to track new conversations on the client side and render the conversation-specific Agent AI widget.
Note: Customers can host the above integration solution within their own domain by obtaining the Integration SDK from their representative.