Tropo has been discontinued and is now part of Webex. You can use this integration only if you already have a Tropo account that was active prior to discontinuation. Proceed with the channel setup only if you have a live Tropo account. You can click here to check for updates related to the Tropo service.
Step 1: Configure your Tropo App
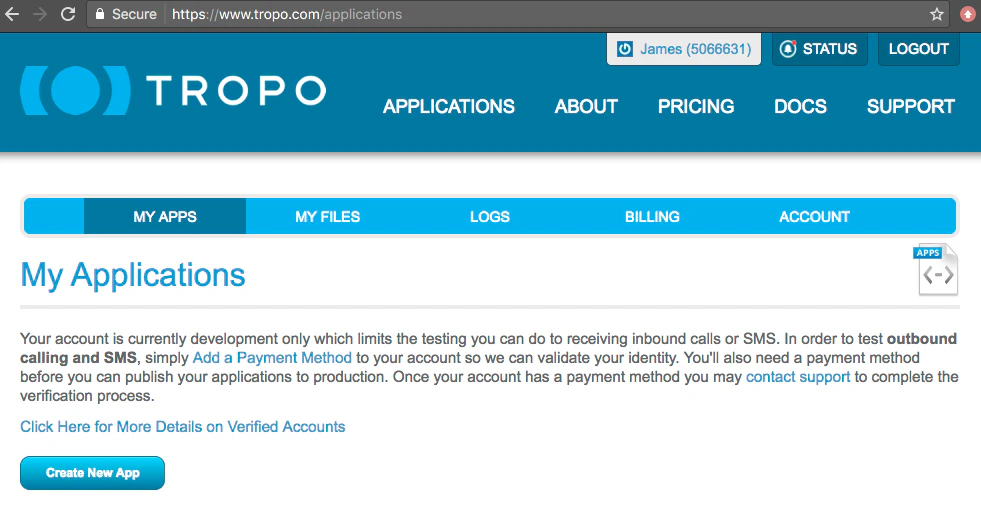
- Log in and navigate to My Apps.
-
Click on Create New App.
-
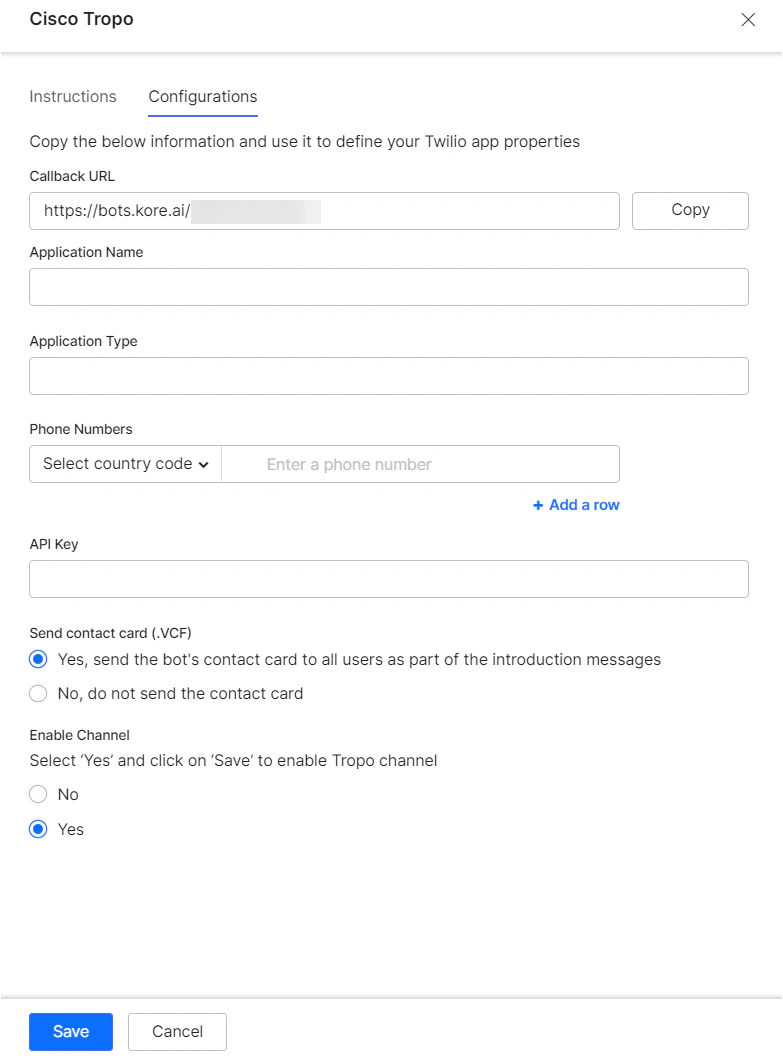
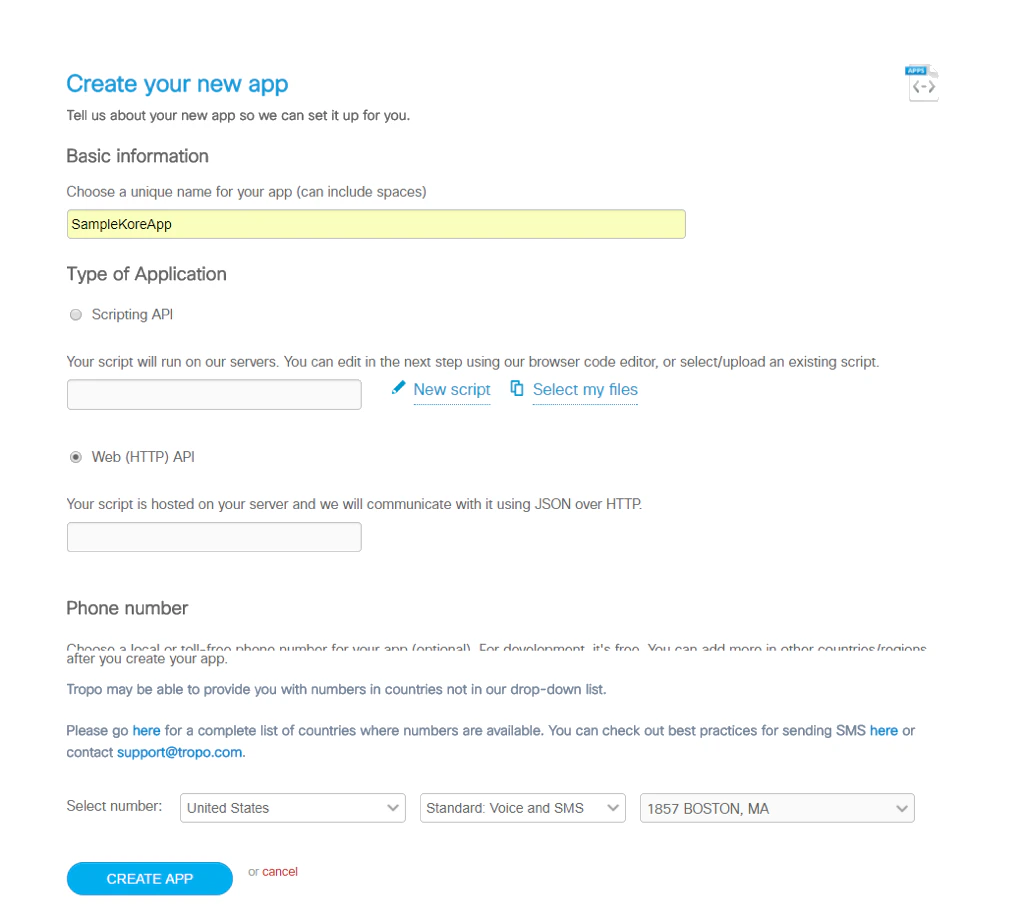
Provide all the required information. Use the Callback URL available in the Configurations tab of the channel configuration page within the XO Platform, and provide it for defining the Type of Application.
The Callback URL now includes the streamid in the API request to identify the AI Agent being accessed. When an incoming request is qualified with this identifier, it helps with traceability, troubleshooting, and remediation at the network level during anomalies like malicious calls or unusual app activity.
-
Click on Create App to complete the app creation. You will be redirected to the Details page of your app.
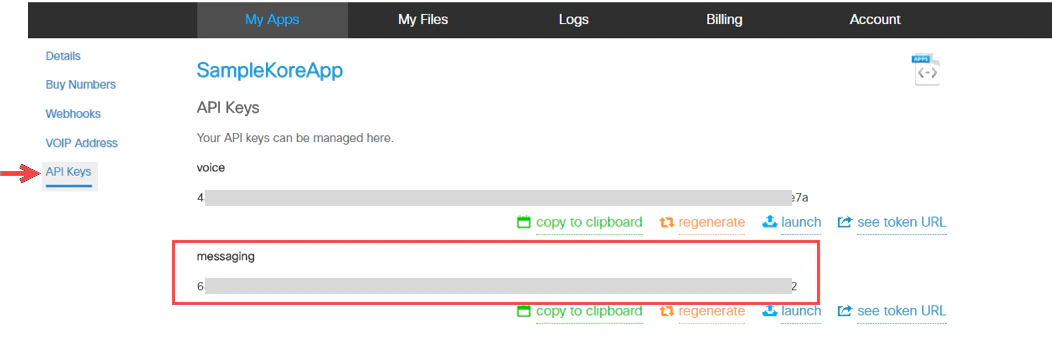
- Make note of the Application Name, Application Type and Phone Number associated with your app, because you will need to provide them in the XO Platform, when configuring the channel.
-
Once the phone number is associated with the application, it can call the app to test using SIP client. Navigate to the API Keys section, make note of the messaging API Key so you can provide it within the XO Platform.
Step 2: Configure the Tropo Channel within the XO Platform
Next, navigate to the Configurations tab to review and complete the channel setup.- Select the assistant that you want to configure the Tropo channel for.
- Go to Channels & Flows > Channels > Digital > All and select Cisco Tropo. The channel setup window opens.
- Click Next or select the Configurations tab.
- Provide the app details you configured within Tropo: the Application Name, Application Type and Phone Number.
- Enter the API Key retrieved from within Tropo.
- Choose whether you want to send a VCF contact card upon the installation of your AI Agent on this channel.
- Select Yes and click Save to enable the channel.