
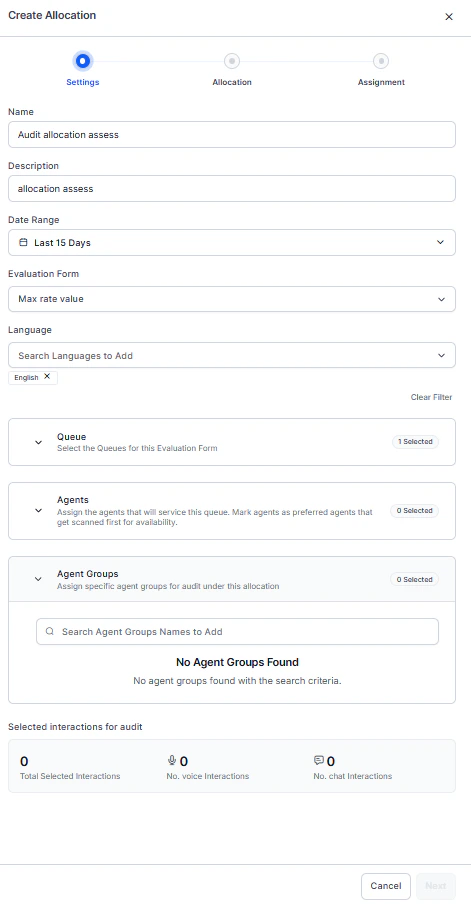
Step 1: Settings
Define the evaluation scope, select the form, and filter the interactions to evaluate.Basic Information
| Field | Description |
|---|---|
| Name | Descriptive name that identifies the allocation purpose. |
| Description | Optional context about the allocation’s purpose, focus areas, or evaluation priorities. |
| Date Range | Date range for the interactions to evaluate. |
| Evaluation Form | Form that guides auditors during review. Also determines which queues appear in subsequent filters. |
| Languages | Languages to include. Select specific languages for language-specific audits, or select all for full coverage. The system shows the total matching interaction count. |
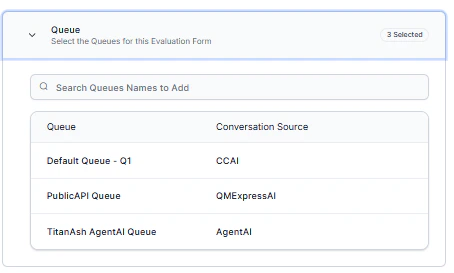
| Queue | Queue associated with the selected evaluation form. |
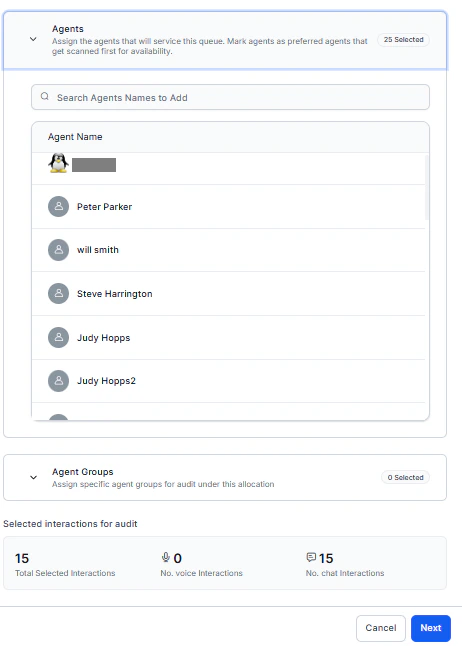
Filter by Agents or Agent Groups
Narrow the scope to specific agents or groups:| Filter | How to use |
|---|---|
| Agents | Select individual agents from the dropdown. Leave empty to include all agents in the selected queues. |
| Agent Groups | Select pre-configured groups for bulk selection. Useful for team-based evaluations. Combine with individual agent selection as needed. |
Step 2: Allocation Type
Choose how to select interactions from the filtered pool.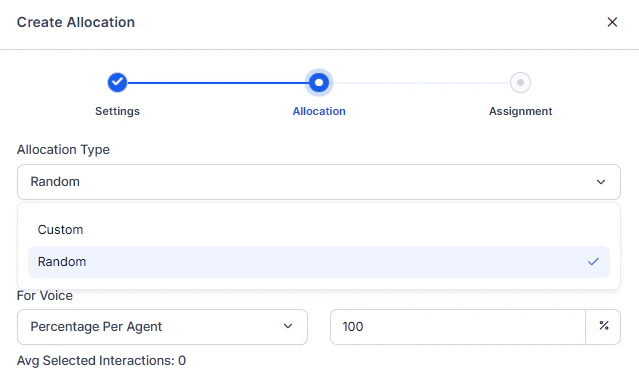
Random Allocation
Uses statistical sampling for impartial interaction selection. Ideal for representative coverage across agents.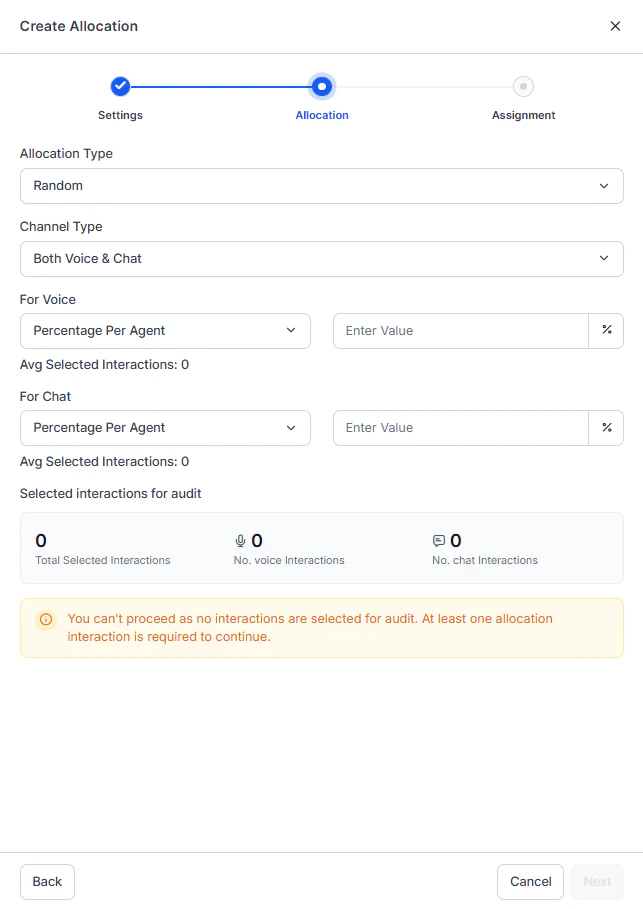
- Select Random.
- Enable the channels to include: Voice, Chat, or both.
-
Select an Assignment Logic:
Logic Description Percentage Per Agent Allocates a consistent percentage of each agent’s interactions. Ensures proportional representation. Interactions Per Agent Assigns a fixed number of interactions per agent. Provides uniform sample sizes. -
Enter the percentage or interaction count. The system displays:
- Average per Agent: Equivalent value in the opposite metric.
- Total Interactions: Real-time total for this configuration.
Custom Allocation
Lets you apply specific filters to target particular scenarios, sentiment ranges, or performance metrics. Ideal for focused evaluations or validating Auto QA accuracy.
- Select Custom.
-
Choose how to define your criteria:
Method When to use Saved Filter Select a filter previously saved in Conversation Mining. Best for recurring audit focuses. Quick Filter Configure a filter directly in the allocation workflow. Best for one-time allocations. 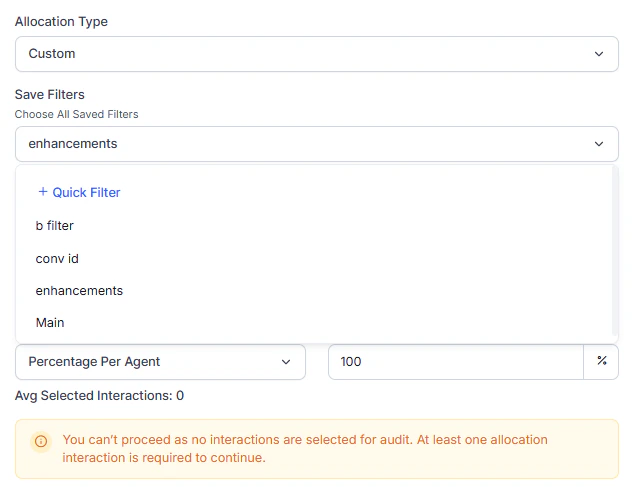
Quick Filter Creation
Select Create Filter to open the quick filter builder.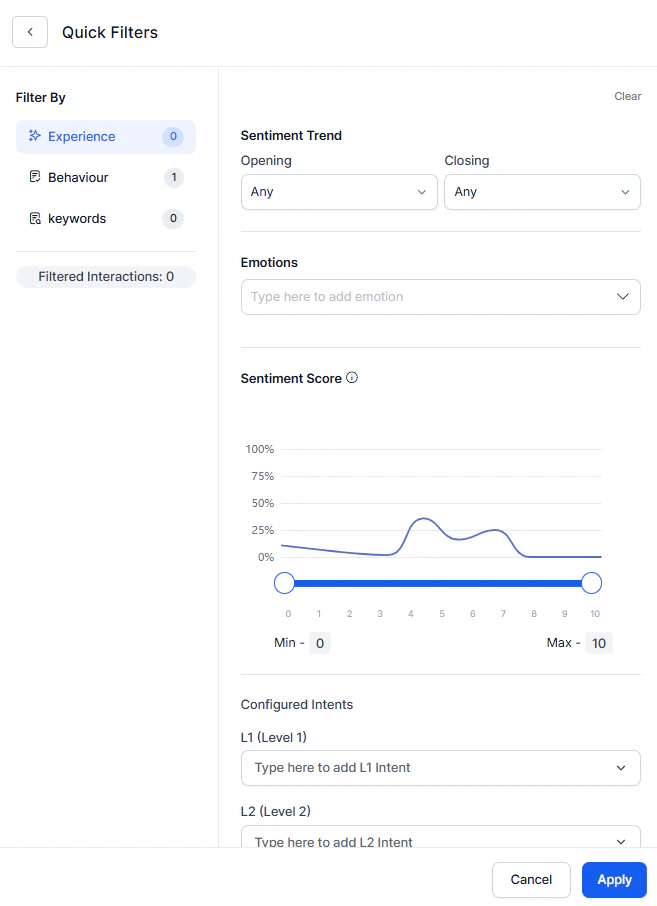
| Filter Category | What you can filter |
|---|---|
| Experience | Sentiment trends, emotions, wait time, CSAT, intents, topics, churn risk. |
| Behavior | Evaluation metrics, empathy score, crutch word usage, playbook adherence, Kore Evaluation Score. |
| Keyword | Include or exclude interactions containing specific words or phrases. |
| Efficiency | AHT, handling time ranges, AHT deviation, number of transfers. |
Per-Agent Control
After defining filters, you can further refine by sampling per agent:- Specify a percentage or interaction count per agent within the filtered set.
- Combine targeted filtering with proportional sampling for precise control.
Step 3: Assignment
Distribute the selected interactions across your auditor team.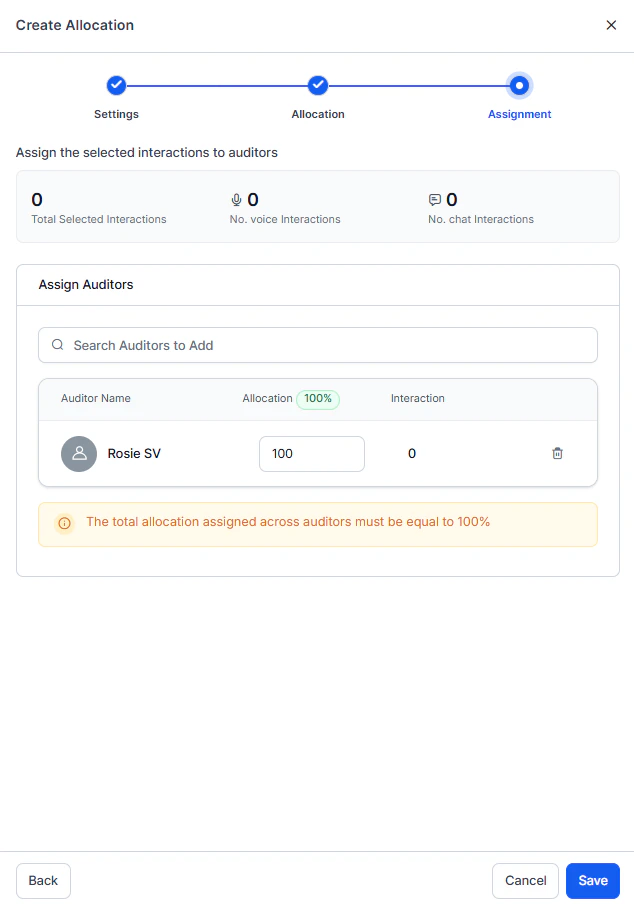
- Use the Search Auditors dropdown to select team members.
- Choose multiple auditors to distribute the workload.
-
Enter the Allocation Percentage for each auditor. The system calculates the exact interaction count per auditor automatically.
Example (100 total interactions, 3 auditors):
- Auditor A: 40% = 40 interactions
- Auditor B: 30% = 30 interactions
- Auditor C: 30% = 30 interactions
- Adjust percentages until they total exactly 100%. The Create button remains disabled until the total reaches 100%.
-
Review the complete configuration:
- Settings: Form, languages, agents, agent groups.
- Allocation: Method (Random or Custom), filters, total interactions.
- Assignment: Auditors and their percentages.
- Select Create to activate the allocation.
After Creating an Allocation
- The allocation appears in your My Allocations tab.
- Auditors see their assigned interactions in Assigned to Me.
- Track completion progress in real-time.
- Edit the allocation at any time to reassign pending interactions.
Use Case: Managing Auditor Availability During Peak Season
Scenario: A QA Manager creates a monthly random sample allocation for 15 auditors. Three days later, two auditors report unexpected leave, leaving 40 pending interactions unassigned.Step-by-Step Resolution
-
Identify the issue
- Open My Allocations tab.
- Locate the “December 2024 Monthly Sample” allocation.
- Confirm that two auditors (John, Doe) have 0 interactions completed and 20 pending each.
-
Access Edit
- Select Edit from the Actions menu.
- Review: Auditor John — 20 assigned, 0 completed, 20 pending. Auditor Doe — 20 assigned, 0 completed, 20 pending.
-
Reassign pending work
- Select the checkboxes for Auditor John and Auditor Doe (40 total pending interactions).
- Select Add New Auditors and choose three auditors with lighter workloads: C, P, R.
-
Configure new distribution
- C: 35% = 14 interactions
- P: 35% = 14 interactions
- R: 30% = 12 interactions
- Verify the total reaches 100%.
-
Complete reassignment
- Select Update.
- C, P, and R immediately see new assignments in Assigned to Me.
- Completed work from original auditors remains unchanged.