The Campaigns module enables proactive outreach to customers through voice calls, SMS, and web channels. Use it to create targeted campaigns, manage contact lists, monitor performance, and maintain compliance with calling regulations.
To access Campaigns, go to Contact Center AI > Campaigns.
Campaigns are not enabled by default. Contact Support to enable them for your account.
Campaign Types
| Type | Description |
|---|
| Voice | Outbound voice calls using agentless, progressive, preview, or power dialers |
| SMS | Outbound text messaging using simple or advanced message flows |
| Proactive Web | Rule-based engagement widgets (chat, banner, post, or button) displayed on websites |
Campaign Management
Go to Contact Center AI > Campaigns > Proactive Outreach > Campaign Management.
 Enable the Outbound Voice Campaigns permission in User Permissions for agents who handle campaign calls.
Agents must be configured for either inbound or outbound — agent blending is not currently available.
Voice Campaigns

Campaign Table
| Column | Description |
|---|
| Name | Campaign name and type |
| Actions | Play/Pause/Replay, Stop, Edit, Clone |
| Priority | 1 (lowest) to 5 (highest); default is 5 |
| Status | Ready, Active, Paused, Rerun, or Completed |
| Progress | Contact count; refreshes every 5 seconds |
| Contact List | The call list being dialed |
| Connection | Flow name (agentless) or queue name (progressive/preview) |
| Last Run | Date of the last run |
| Last Updated | Date of the last update |
| Status | Meaning |
|---|
| Ready | Saved and ready to run |
| Active | Currently running |
| Paused | Temporarily stopped |
| Rerun | Restarting after completion |
| Completed | All contacts dialed or end date reached |
The Campaigns module requires a Voice Gateway account. If the account uses AudioCodes, or is switched from AudioCodes to Voice Gateway, Campaigns becomes unavailable.
Dialer Types
Agentless Dialer
Automatically dials numbers without a live agent. When a call is answered, it connects to a configured voice experience flow. The dialer detects answering machines, reschedules unsuccessful calls, and generates call metrics. Campaign managers configure the number of simultaneous calls.
- Select a Start Flow during campaign creation.
- Turn on Answering Machine Detection (AMD) to detect voicemail.
- Configure an Automation Node in the start flow for advanced automation.
 Progressive Dialer
Automatically dials the next contact when an agent becomes available — one call per available agent. For example, 10 free agents triggers 10 concurrent dials. Filters out voicemails and busy lines before connecting the agent.
Progressive Dialer
Automatically dials the next contact when an agent becomes available — one call per available agent. For example, 10 free agents triggers 10 concurrent dials. Filters out voicemails and busy lines before connecting the agent.
- Select a Queue during campaign creation.
- Turn on Answering Machine Detection if needed.
 When a call connects, it appears in the agent’s Conversation Tray with the campaign name.
 The agent can mute, hold, or end the call.
 Dispositions appear after the call ends.
 Dialing logic when agents are assigned to multiple campaigns:
- Higher-priority campaigns are dialed first.
- Campaigns with equal priority are dialed at random.
- Example: Two Priority 5 campaigns and one Priority 4 campaign — the system randomly dials from the Priority 5 campaigns first, then moves to the Priority 4 campaign.
Preview Dialer
Provides agents with customer details before placing a call, enabling a more personalized interaction. Agents control when to initiate the call.
- Select a Queue and set the Maximum Skips per record during campaign creation.
 Call handling:
- The agent receives one contact at a time with Dial and Skip options.
- A 30-second timer applies: dial within 30 seconds to place the call, skip to reassign, or take no action to auto-dial.
- Skipped contacts follow retry logic based on the configured maximum attempts.
- Once the skip limit is reached, the skip option is no longer available for that campaign instance.
- A dialing number is locked to prevent duplicate dials by other agents.
 During the call, the agent can mute, hold, or end the interaction.
 Dispositions are displayed when the call ends.
 Power Dialer
Uses a pacing ratio to dial multiple outbound calls per available agent, reducing call abandonment. The system re-fetches contact lists and re-runs DNC scrubbing when a campaign starts or its configuration changes.
Power Dialer
Uses a pacing ratio to dial multiple outbound calls per available agent, reducing call abandonment. The system re-fetches contact lists and re-runs DNC scrubbing when a campaign starts or its configuration changes.
- Select a Queue and set the Pacing Ratio (default: 2; maximum: 10) during campaign creation.
Call handling:
-
When an agent becomes available, the system dials multiple contacts based on the pacing ratio.
-
The agent’s status is set to System Busy (or Busy if System Busy is not configured) during dialing.
-
A connecting message displays while the system establishes a connection.

-
When a customer answers, the call is auto-accepted and appears in the agent’s conversation tray.

For all voice campaign types (agentless, progressive, and preview), phone numbers and experience flows are decoupled. The caller ID does not need to match the attached flow. All outbound-enabled phone and SIP numbers appear in the campaign configuration dropdown.
Filters
Campaign managers can create, save, duplicate, set as default, edit, and delete filters.
To create a filter:
-
Select Filters > + Add New Filter.
-
Select Status, Priority, and Dialing Mode with their sub-filters.

-
Select Save & Apply, enter a name (up to 20 characters), and select Save & Apply.

-
Turn on Make this the default view to set it as the default filter.

-
Open the Filters dropdown to view saved filters. Hover over a filter to see management options.

To manage saved filters, hover over a saved filter and select an option:
| Action | Description |
|---|
| Duplicate | Create a copy with the same attributes |
| Mark as Default | Set as the default view; select again to unmark |
| Delete | Remove the filter |
| Edit | Modify and re-save |

 Mark as default: Select Mark as Default. A notification confirms the change.

Create a Voice Campaign
-
On the Voice tab, select + New Campaign.
-
Under the General tab, enter:
- Campaign Name and Description
- Contact Lists (select from the dropdown, then Done)
- Priority and Dialing Mode
Only one DNC list is allowed per campaign. The contact list is automatically scrubbed against the DNC list after saving.
-
Under Choose Contact, configure:
- Contact lists with matching fields and the same source type
- Optional: Enable Filter Contact List Columns and configure filter conditions
- DNC List and optional mapping list

-
Under Outreach Strategy, configure:
| Setting | Description |
|---|
| Caller ID | Number displayed to the recipient |
| Dialing Order | Order in which phone numbers are dialed |
| Max Attempts Per Contact | Maximum dial attempts per number |
| Default Retry Period | Wait time (minutes) between retry attempts |
| Max Ring Time | Duration (seconds) before disconnecting an unanswered call |
| Contactable Timings | Days and time windows for dialing |
Calls are dialed based on Contactable Timings and timezone, regardless of the campaign start and stop time. The Caller ID dropdown shows all SIP and non-SIP numbers registered with the bot that are configured as outbound-only or inbound-outbound.
-
Select Save.
Schedule a Voice Campaign
-
Select the Schedule tab and turn on Schedule Campaign.

-
Set the Start Date & Time. End Date & Time is optional.

-
Select the Time Zone.

-
To repeat the campaign, turn on Recurrence and select Daily, Weekly, Monthly, or Yearly. Set the interval using Every “n” days/weeks/months.
-
Turn on Allow Recurrence Precedence to give recurrence start and end times priority over Contactable Timings.

-
Select Save.
- When a timezone is set in Contactable Timings, it becomes the default for the Schedule section. You can change it.
- Contacts are dialed according to Contactable Timings, not the campaign start time.
- The system scrubs contacts again 15 minutes before the scheduled start time.
- Selecting Run on a scheduled campaign shows an error; it starts automatically at the scheduled time.
- On each recurrence, the campaign starts fresh from the full contact list.
Stop a Scheduled Campaign
Select Stop under Actions and confirm. This ends the current instance of the campaign.

Dispositions
The Dispositions tab configures retry logic for dispositions considered as not fully attempted.
To configure disposition retry logic:
-
Select + Add Disposition Retry.
-
Configure the required details and select ✓ to save.

You can mark specific dispositions as Positive Final Outcomes to improve conversion metrics in analytics.
Current Disposition Counts shows counts for all dispositions in the Default Disposition Set — for the active campaign, or the last run of a completed campaign.

The system enforces a one-to-one relationship between campaigns and Disposition Sets. Each queue can have only one Campaign-linked Disposition Set. Campaigns can only link to queues that have exactly one
Campaign-linked Disposition Set.
Edit a Voice Campaign
-
Select ⋮ beside the campaign name and select Edit.
-
Make changes and select Save.

Active campaigns cannot be edited. For campaigns in other statuses, only limited fields are editable.
Clone a Voice Campaign
-
Select ⋮ beside the campaign name and select Clone.

-
The system creates a cloned campaign.

The schedule configuration is not copied when cloning.
Stop a Voice Campaign
-
Select Stop under Actions.

-
Select Stop to confirm.

Stopping resets campaign data. Rerunning creates a new instance.
Delete a Voice Campaign
-
Select ⋮ beside the campaign name and select Delete.
-
Select Delete to confirm.

Run a Voice Campaign
Select the Play button to start. A phone number, queue, and flow must be attached before running.

For Active, Future-Scheduled, and Paused campaigns, linked phone numbers and experience flows cannot be deleted.
SMS Campaigns
Go to Campaign Management > SMS.

To run SMS campaigns, configure the SMS channel first.
Learn more.
Campaign Table

| Column | Description |
|---|
| Campaign | Campaign name |
| Actions | Play/Pause/Replay, Stop, Edit, Clone |
| Priority | 1 (lowest) to 5 (highest); default is 5 |
| Status | Ready, Run as Emergency, Active, Paused, Rerun, or Completed |
| Progress | Contact count; refreshes every 5 seconds |
| Contact List | Lists being messaged |
| Schedule | Start and end dates |
Filters
Campaign managers can create, save, duplicate, set as default, edit, and delete filters.
To create a filter:
-
Select Filters in the top-right corner.

-
Select + Add New Filter.

-
Select Status and Priority with their sub-filters.

-
Select Save & Apply, enter a name (up to 20 characters), and select Save & Apply.

-
Turn on Make this the default view to set it as the default filter.

-
Open the Filters dropdown to view saved filters.

Duplicate a filter: Select Duplicate, enter a name, and select Save.


 Mark as default: Select Mark as Default.
 Delete a filter: Select Delete, then confirm.
 Edit a filter: Select Edit, make changes, and select Save & Apply.


Create an SMS Campaign
-
Select + New Campaign.

-
Under the General tab, enter:
- Campaign Name and Description
- Contact Lists, DNC List, and Priority

-
Under the Message tab, select a format:
-
Simple: For one-way outbound messages. Select a template and edit the message content.

-
Advanced: For two-way messaging using a start flow with dialog tasks. Supports agent transfers.

Editing a template within a campaign does not modify the original template. The template selection resets to “None” when edited.
-
Select Save after entering the message.

-
Under Outreach Strategy, select the Caller ID:
- Simple format: Shows numbers configured for outbound only, not linked to any flows.
- Advanced format: Shows numbers with associated SMS flows that support two-way communication.
-
Select Save.
Edit an SMS Campaign
-
Select ⋮ beside the campaign name and select Edit.

-
Make changes and select Save.

Clone an SMS Campaign
-
Select ⋮ beside the campaign name and select Clone.

-
The system creates a copy.

Delete an SMS Campaign
-
Select ⋮ beside the campaign name and select Delete.

-
Select Delete to confirm.

Run an SMS Campaign
Select the Play button, then select Run. The campaign status changes to Active.

Run as Emergency
Runs the campaign immediately, overriding any schedule and calling hours. The campaign processes at full capacity before all other campaigns.
-
Select the Play button, then select Run as Emergency.

-
Select Confirm on the alert.

-
A warning appears at the top and a warning icon displays next to the campaign name.

Emergency campaign behavior:
-
Cannot be paused or resumed — only stopped and rerun.
-
CSV-based campaigns end when all contacts receive a message.
-
API-integrated campaigns must be stopped manually.
-
Only one emergency campaign can run per account at a time. If another campaign is already running as emergency, an alert appears.

-
After completion, the schedule changes to manual if it was previously scheduled.
- A running campaign cannot be started as emergency without stopping it first.
- A non-emergency campaign that was paused can only be resumed as non-emergency.
- API contact pull errors do not affect ongoing campaigns.
Stop an SMS Campaign
-
Select Stop under Actions.

-
Select Stop to confirm.

Stopping resets campaign data. Rerunning creates a new instance.
Proactive Web Campaigns
Go to Campaign Management > Proactive Web.

Campaign Types
| Type | Description |
|---|
| Chat | Pushes a configured message to the chat widget |
| Banner | Displays a banner at the top or bottom of the page |
| Post | Displays a pop-up at the center of the page |
| Button | Displays a button on the left or right side; can be static or action-triggered |
Campaign Table

| Column | Description |
|---|
| Name | Campaign name and type |
| Actions | Play/Pause/Replay, Stop, Edit, Clone |
| Status | Ready, Active, Paused, or Completed |
| Type | Chat, Post, Banner, or Button |
| Sent | Count of proactive messages sent |
| Goals | Count of campaign goals achieved |
Filters
To create a filter:
-
Select Filters.
-
Select + Add New Filter and choose Web Campaign Type and Status with their sub-filters.

-
Select Save & Apply, enter a name, and select Save & Apply.
-
Turn on Make this the default view to set it as the default.

Duplicate a filter: Select Duplicate, enter a name, and select Save.
 Mark as default: Select Mark as Default.
 Delete a filter: Select Delete, then confirm.
 Edit a filter: Select Edit, make changes, and select Save & Apply.

Create a Proactive Web Campaign
Select + New Campaign, then select the campaign type.
 Chat
Chat
-
Select Chat.

-
Under the General tab, enter Campaign Name and Description.
-
Under Layout Design:
-
Edit the Message Header (text and optional image).

-
Enter the message content (supports formatting, links, and variables).

-
Add buttons with Text, Action (Send to URL / Send to AI Agent / Dismiss), Background Color, and Text Color.

-
Set Message Bubble Alignment, Bubble Alignment, and Dark Shadow.

-
Under Engagement Strategy, configure:

-
Website: Add the URLs or page names the campaign applies to.
-
Rules: Define trigger conditions based on visitor behavior.

-
Exclusions: Define conditions that prevent the campaign from triggering.

-
Goals: Define campaign objectives.
-
Channel: Select the delivery channel.
-
Engagement Hours: Choose Anytime (24/7) or Custom (specific days and times in a selected timezone).
-
Select Save.
Available built-in rule fields:
| Field | Data Type | Supported Operators |
|---|
| Page Visit Count | Number | Equals, Greater Than or Equal To |
| Time Spent | Number | Equals |
| User | String | Is (known / anonymous) |
| Country | String | Is |
| State | String | Is |
| City | String | Is |
| Device | String | Is (Mobile / Laptop / Tablet) |
| URL | String | Contains, Ends With |
| Page Name | String | Is, Contains |
| Hover On | String | ID, Class, Query Selector |

When creating a campaign from a template, any predefined rules appear in the Rules section as a single group that you can view and edit.
-
Select Post.

-
Complete the General tab. Under Layout Design, enter the message and select a Size.

-
Configure Engagement Strategy (same as Chat) and select Save.
Banner
-
Select Banner.

-
Complete the General tab. Under Layout Design, enter the message and set Pattern (Sticky/Floating), Placement (Top/Bottom), Background, and Text Color.
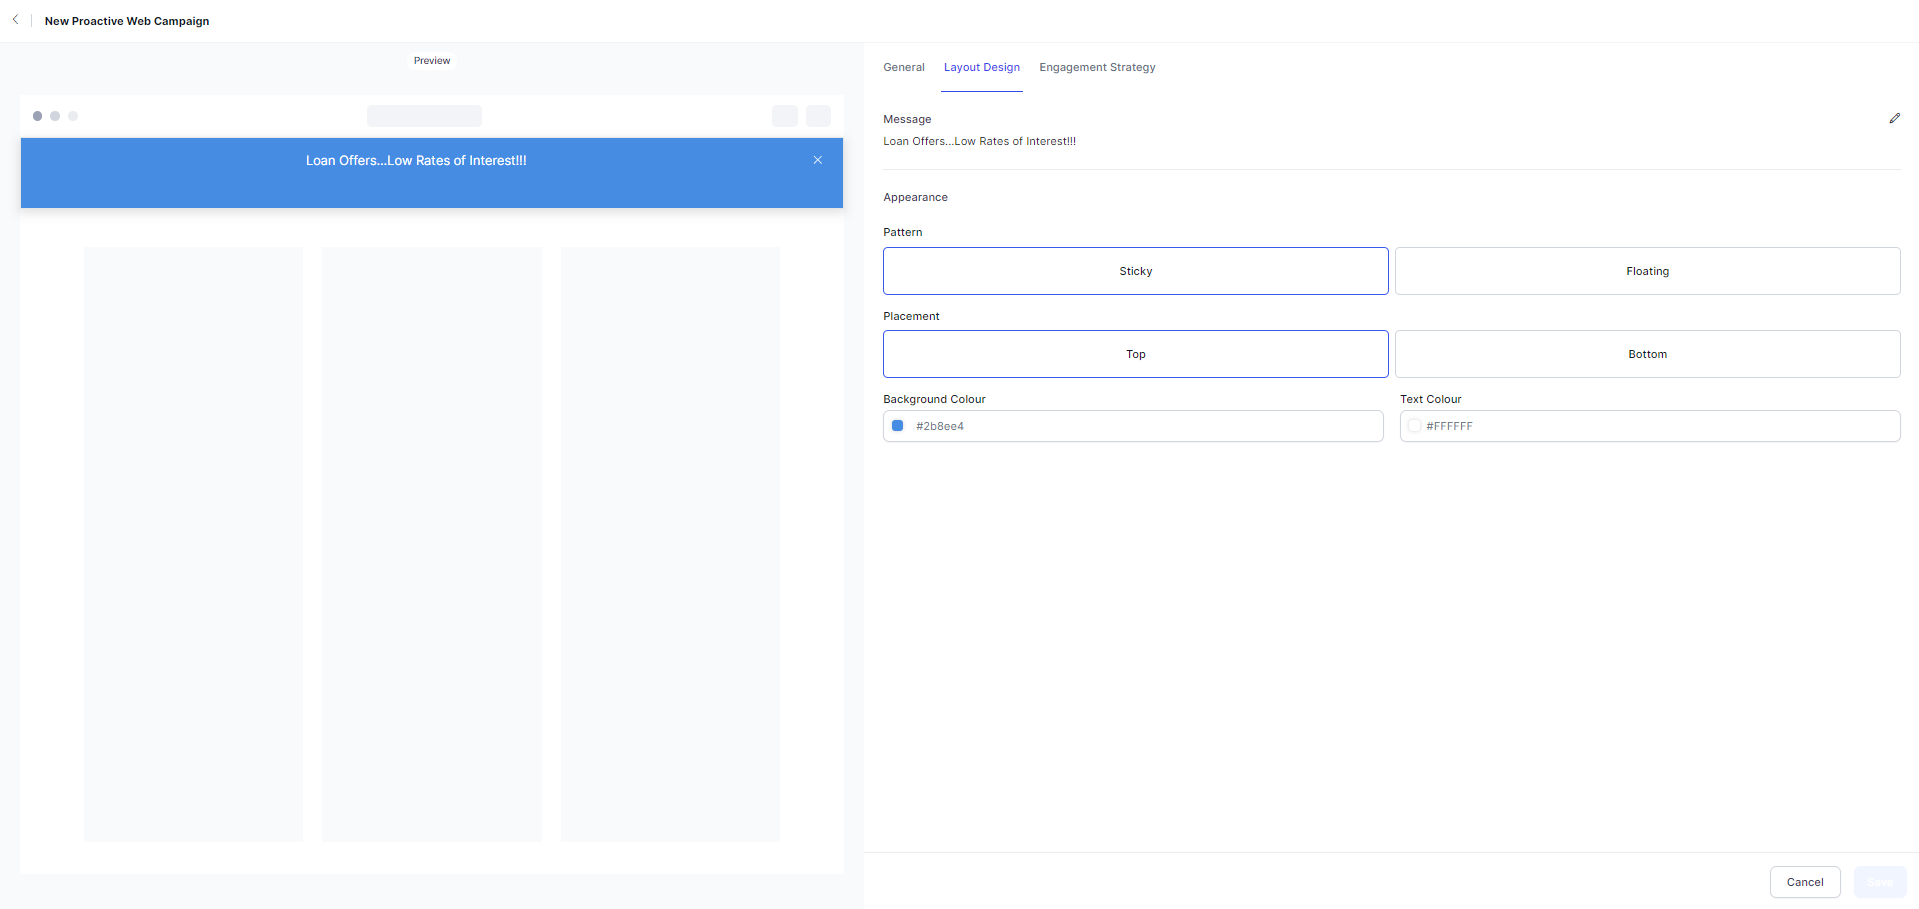
-
Configure Engagement Strategy (same as Chat) and select Save.
Button
-
Select Button.

-
Complete the General tab. Under Layout Design, configure:
- Button Text and Action (Send to URL / Slide Out Message)
- Optional image and header text
- Message content and layout
- Background Color, Text Color, and Placement (Left/Right)

-
Configure Engagement Strategy (same as Chat) and select Save.
Templates
Use templates to create campaigns with a pre-defined structure.
- Select + New Campaign > All Templates or Choose from Templates.
- Select a template and select Use this Template.
- Complete the required fields and save the campaign.
Schedule a Proactive Web Campaign
-
Select the Schedule tab and turn on Schedule Campaign.
-
Set the Start Date & Time. End Date & Time is optional.
-
Select the Time Zone.
-
To repeat the campaign, turn on Recurrence and select Daily, Weekly, Monthly, or Yearly.

-
Turn on Allow Recurrence Precedence to give recurrence start and end times priority over Contactable Timings.
-
Select Save.
- When a timezone is set in Contactable Timings, it becomes the default for the Schedule section.
- Contacts are dialed according to Contactable Timings, not the campaign start time.
- The system scrubs contacts again 15 minutes before the scheduled start time.
- Selecting Run on a scheduled campaign shows an error; it starts automatically at the scheduled time.
- On each recurrence, the campaign starts fresh from the full contact list.
Stop a Scheduled Campaign
Select Stop under Actions and confirm. Re-running a stopped scheduled campaign creates a new instance and contacts all recipients again.
Edit, Clone, Stop, Delete, and Run
Select ⋮ beside the campaign name for Edit, Clone, or Delete. Use the Play button to run. Select Stop under Actions to stop.


Export and Import Campaigns
Export:
- Select one or more campaigns to export (maximum 50 per operation; run multiple operations for more).
- Two selection modes:
- Select All (Page-Level): Selects all campaigns on the current page; resets on navigation.
- Individual Selection (Multi-Page): Persists across pages for precise multi-page selection.
- Selections clear when you apply search or filters, sort, refresh, or save, clone, or delete campaigns.
- Each export generates a log entry in Campaign Logs.
- The system exports the file as a CSV.
Import:
- Imports all campaigns in an exported file. Partial imports are not supported.
| Result | Message |
|---|
| All imported successfully | ”NN Campaigns imported successfully!” |
| Partial success | ”Import partially successful. XX successfully imported, YY failed. See the Campaigns log for details.” |
- Skipped campaigns are recorded in Campaign Logs with the name and reason for skipping.
- Successfully imported campaigns display the Recently imported label until end of day.
Campaign Suppression and Re-evaluation
The system suppresses a campaign for a visitor when:
- A cooldown period is active after another campaign ran
- An active chat is in progress
- Another campaign template is already active in the browser
- Any other suppression condition applies
When the suppression reason clears, the system re-evaluates the campaign on the next matching URL visit.
Suppression and re-evaluation applies consistently across all suppression types. Page Visit Count and other metrics continue to update during suppression.
Proactive Web Campaign Plugin
The Proactive Web Campaign plugin extends the Web SDK to enable dynamic, rule-based visitor interactions. For installation, configuration, and examples, see the GitHub repository.
Campaign Logs
Go to Contact Center AI > Campaigns > Campaign Management > Logs.
The Logs page shows all event logs for the current day by default.

| Column | Description |
|---|
| Date & Time | Exact timestamp of the event |
| Log Type | Campaign type (for example, Proactive Web) |
| Sub Type | Event type (for example, Run time) |
| Description | Summary in the format: <campaign-name> was <shown> or <NOT shown> to <user>. Reason: <reason>. |
List Management
Go to Contact Center AI > Campaigns > List Management.

Contact Lists
Contact lists contain the phone numbers and customer details used for campaigns.
| Column | Description |
|---|
| Contact Lists | Name of the list |
| Actions | Edit and Delete |
| Status | Validating, Validated, or Invalid |
| Contacts | Total contact count |
| Campaigns | Associated campaign names |
| Last Updated | Date of last update (default sort) |
Create a Contact List
From Local Drive:
-
Select + New Contact List.
-
Enter Name and Description, and select Local Drive as the source.
-
Upload a CSV file.
Phone numbers must be in E.164 format (Country Code + Area Code + Subscriber Number) enclosed in double quotes. Phone Number is required for voice campaigns. The table supports up to 150 columns with a maximum of 300 characters per column.
-
Select Mapping Fields and select Save.
From API Integration:
-
Select + New Contact List.
-
Enter Name and Description, and select API Integration.
-
Select the Method and enter the URL.
-
Set the Data Sync Interval (up to 24 hours).
-
Set the Data Sync Mode:
- Append and remove duplicates: Excludes duplicate contacts.
- Append and allow duplicates: Re-contacts duplicate entries.
-
Configure the Authorization Profile.

-
Add any required Headers as key-value pairs.
-
Select Validate to preview the API response.
-
Configure Mapping Fields:
- Root-level fields: Use the key name directly (for example,
firstName).
- Nested fields: Use dot notation (for example,
contact.name.first).

-
Select Save.
You can use environment variables (plain or encrypted) for API keys. If an API-integrated contact list’s schema changes and the list is linked to a campaign, the system shows a warning before applying the new schema.
Using Contact List Fields in Flows
Mapped and unmapped contact fields are accessible in Dialog Tasks and Experience Flows via the UserSession context object.
To retrieve all field labels:
Use this in a Message Node or Script Node:
{{JSON.stringify(context.session.UserSession.campaignUserInfo)}}
 View the returned labels from the Transcripts tab of the Interactions Dashboard.
.png) To access fields by label (Script Node):
To access fields by label (Script Node):
const campaignUserInfo = context.session.UserSession.campaignUserInfo;
const number = campaignUserInfo.phoneNumber;
context.campaignUserInfoNumber = number;
 Dynamic field retrieval in voice flows (Script Node):
let userInfo = context?.campaignUserInfo;
setCallFlowVariable('userInfo', userInfo);
 Use retrieved values in a Message Node:
Hi {{context.userInfo.firstName}} {{context.userInfo.lastName}}, your balance on {{context.userInfo.phoneNumber}} is {{context.userInfo.balance}}, please recharge before {{context.userInfo.dueDate}}.
 The system fetches each value from the CSV using the column header as the key (for example,
 context.userInfo.firstName maps to the firstName column).


Time Zone
- The timezone set for a contact in the CSV takes priority over the campaign’s Calling Hours timezone.
- Use Tz database format (for example,
America/Phoenix, Asia/Hong_Kong, Pacific/Fiji).
- Contacts whose timezone falls outside the configured calling hours are skipped.
- Skipped contacts appear as Unconnected Calls on the Campaign Dashboard.
Edit a Contact List
- Local Drive: Select the Edit icon and upload a new file. You can only append — existing records cannot be modified directly.
- API Integration: Select the Edit icon, then the edit icon next to the URL, make changes, and save.
Delete a Contact List
Select the Edit icon, then select the Delete icon at the lower left of the edit window and confirm.
You cannot delete a contact list that is associated with any campaign.
DNC Lists
Do Not Call (DNC) Lists contain contacts who have opted out of being contacted. The count includes contacts from uploaded CSV files and contacts added directly through AI or human agents.
| Column | Description |
|---|
| DNC Lists | List name |
| Status | Validating, Validated, or Invalid |
| Contacts | Total contact count |
| Campaigns | Associated campaigns |
| Last Updated | Default sort order |
| Actions | View, Edit, Delete, Mark as Global |
Create a DNC List
- Select + New DNC List.
- Enter Name and Description.
- Upload a CSV file (download the CSV Template if needed).
- Select Mapping Fields and select Next.
View a DNC List
Select the 👁 icon. The list shows phone numbers, validity status, and options to edit or delete entries. You can also add new contacts from this view.
Edit a DNC List
Select 🖉, upload an updated file, and save. The system appends the new records.
You cannot delete a DNC list while it is in use by a campaign.
Delete a DNC List
Select 🖉 > Delete icon (lower left) > confirm.
Mark as Global
- Select ⋮ > Mark as Global > Confirm.
The Global DNC list is marked with a distinct color and the Global label.
- A default Global DNC list (empty, named “Default Global DNC”) is created when Campaigns is enabled.
- Only one list can be Global at a time. Marking a new list as Global automatically unmarks the previous one.
- A DNC list is required when creating a voice campaign (via UI or API).
DNC Handling — Global and Non-Global
- The Global DNC list applies automatically to all voice campaigns without explicit assignment.
- For each voice campaign, the contact list is scrubbed against the Global DNC list first, then any campaign-specific DNC lists.
- SMS and Proactive Web campaigns are scrubbed only against explicitly linked DNC lists.
- Editing or un-globalizing a DNC list does not affect active or paused campaigns.
Agent Mapping
Agent Mapping assigns each customer to a specific agent and sets Customer Priority, ensuring the right agent handles the call and high-priority customers are contacted first.
Add a Mapping List
- Select + New Mapping List.
- Enter a name and description, then upload a CSV file.
- Select Save.
View, Edit, and Delete a Mapping List
| Action | Steps |
|---|
| View | Select 👁; select + Add New Contact Mapping to add entries |
| Edit | Select 🖉, make changes, and save |
| Delete | Select 🗑 and confirm |
List Management Logs
Go to Contact Center AI > Campaigns > List Management > Logs.
 Shows activity logs for contact lists fetched through API integration.
| Column | Description |
|---|
| Date & Time | Timestamp of the API call |
| Contact Lists | Contact list name |
| Campaigns | Campaign name |
| Status | Completed or Failed |
| Description | Status details (for example, “Successfully fetched 100 contact records”) |
| Export | Download fetched contacts as a JSON text file |
SMS Templates
Go to Contact Center AI > Campaigns > Templates.


| Column | Description |
|---|
| Templates | Template name |
| Status | ”In Use” if assigned to a campaign |
| Actions | Clone, Preview (system templates); Edit, Clone, Preview, Delete (custom templates) |
| Type | System Template (built-in) or Custom Template (user-created) |
| Campaigns | Campaigns using this template |
| Created By | User name, or “System” for built-in templates |
| Last Updated | Default sort order |
Create a Template
-
Select + New Template.

-
Enter Template Name and Description, then select the 🖉 icon to open the message editor.

-
Enter the message and select Save.

-
Review the mobile preview on the left side.

-
Select Save.

Edit a Template
-
Select ⋮ beside a custom template and select Edit.

-
Make changes and select Save.

Clone a Template
-
Select ⋮ beside any template and select Clone.

-
A copy is created.

Preview a Template
-
Select ⋮ beside any template and select Preview.

-
The preview page displays the message as it appears on a mobile device.

Delete a Template
-
Select ⋮ beside a custom template and select Delete.

-
Select Delete to confirm.

Dashboard
Go to Contact Center AI > Campaigns > Dashboard.

| Column | Description |
|---|
| Campaign Name | Name of the campaign |
| Campaign Type | For example, Agentless (voice only) |
| Progress | For example, “3 of 10” |
| Status | Ready, Active, Paused, Rerun, or Completed |
| Campaign Start Date and Time | Date and time the campaign started |
Voice Campaign Details

Overview

| Metric | Description |
|---|
| Progress | Overall campaign progress |
| Connected Calls | Count and percentage of connected calls |
| Unconnected Calls | Count and percentage of unconnected calls, including retries |
| Avg. Call Duration | Average duration of all connected calls |
Outcome
 Displays the top 5 outbound dialer dispositions and top 5 agent dispositions as bar charts.
- Outbound Dialer Dispositions: Busy, Connected, Failed, No Answer, Answering Machine, DNC Excluded, Filter Skipped, Retry Cancelled.
- Agent Dispositions: Unresolved, Requires Supervisor, Resolved, System Generated, and any custom dispositions.
Disposition vs. Attempts Table
Maps each outbound attempt to its latest disposition. When a conversation advances to a new attempt, the previous entry is replaced. The table updates in real time.
- X-axis: Dispositions configured for the campaign
- Y-axis: Attempt numbers, starting from 1
Only the latest attempt per conversation is counted. Ongoing conversations are included based on their current attempt and disposition.

Latest Execution
A consolidated list of all calls in the most recent campaign run, shown as conversation entries.
Call list scope: Includes all phone numbers from the associated contact list. Contacts removed before dialing show one of these dispositions:
- DNC excluded: Removed by DNC scrubbing
- Filter excluded: Removed by campaign filters

| Column | Description |
|---|
| Phone Number | Contact’s phone number |
| Number of Attempts | Accumulated attempt count |
| Priority | Contact priority |
| Start Time | Start time of the last call |
| Duration | Duration of the last call |
| End Time | End time of the last call |
| Agent | Agent icon; hover to see agent name |
| Disposition | Agent-provided disposition, or last system status if no agent disposition is available |

SMS Campaign Details

Overview
| Metric | Description |
|---|
| Progress | Overall campaign progress |
| Messages Delivered | Total delivered message count |
| Delivery Rate | Messages received ÷ messages sent × 100 |
Messages Delivered
View delivery counts for the Last 24 hours, Last 7 days, or Last 30 days. Hover over data points to see the message count and delivery rate for that period.

Latest Execution
Same layout as voice campaign Latest Execution. Columns: Phone Number, Number of Attempts, Priority, Start Time, Duration, End Time, Agent, Disposition.
Filter, Search, and Sort — Latest Execution
| Capability | Voice Campaigns | SMS Campaigns |
|---|
| Filter | Disposition, Priority, Date range | Date range |
| Search | Phone Number, Last Name, First Name | Phone Number, Last Name, First Name |
| Sort | Start Time (default), Priority, Disposition | Start Time (default), Priority, Disposition |
Settings
Go to Contact Center AI > Campaigns > Settings.

Global Settings

| Setting | Description | Default |
|---|
| Max Concurrent Calls | Maximum simultaneous calls for Agentless campaigns (Progressive and Preview are unaffected) | 10 (max: 25) |
| Total Messages Per Minute | Maximum SMS messages sent per minute | 1 |
| Power Dialing Customer Wait Time | How long a customer waits on hold for an agent before the call ends | 5 seconds (min: 3 seconds) |
| Power Dialing Agent Idle Max Time | Maximum agent idle time before releasing the agent back to the queue | 30 seconds (min: 5 seconds) |

Proactive Cooldown Time
Controls how often proactive widgets appear to the same visitor in a session, preventing campaigns from triggering in rapid succession. Applies per app and per visitor session.
Once a visitor sees a campaign widget, no other widget displays until the cooldown period ends — even if the visitor meets the criteria for other campaigns. Only rules met after the cooldown ends are eligible for display. Page Visit Count and other metrics continue to update during cooldown.
A campaign template will not display if:
- Another campaign template is already active in the browser window
- A cooldown period is in effect
- The user is in an active chat session
- The chat window is open
 To configure cooldown time:
-
Select Proactive CoolDown Time.

-
Enter a value between 0 and 30,000 (default: 0), and select Save.

This setting applies to all proactive campaigns within the application.
Unanswered Call Attempts
Automatically adds phone numbers to the Global DNC list when they repeatedly fail to connect during voice campaigns.

| Setting | Description |
|---|
| No. of Attempts to Trigger DNC Enrollment | Number of failed attempts before adding the number to Global DNC (range: 1–100; default: 30) |
| How Long to Keep in DNC | Months to retain the number in the Global DNC list (0 = no expiry) |
Voice Machine Timeouts
Defines how long the system waits at each stage of an IVR or answering machine interaction before taking action.

| Setting | Description |
|---|
| Decision Timeout | How long to wait for the machine to respond before returning control |
| Greeting Completion Timeout | How long to wait for silence after a greeting message before returning control |
| No Speech Timeout | How long to wait for speech to begin |
| Tone Timeout | Maximum time to wait to detect a beep or tone |
FAQ
What is the difference between resuming a paused campaign and rerunning a completed campaign?
Resuming a paused campaign restarts from where it stopped. Rerunning a completed campaign (using the Rerun icon) starts from the beginning of the dial list as a new instance with no data carried over from the previous run.
Can two campaigns share the same contact list?
Campaigns can share contact lists, but two campaigns cannot run simultaneously with the same contact list.
How many contact lists can a campaign have?
Up to 10 contact lists per campaign.
How many DNC lists can a campaign have?
One DNC list per campaign.
What is the maximum number of contact lists per account?
1,000 contact lists per account.
What are the DNC list limits?
Each DNC list supports up to 1 million records. Each account supports up to 2 million total DNC records and up to 1,000 DNC lists.
How many voice campaigns can run concurrently?
Up to 50 voice campaigns at the same time.
What are the contact limits?
Each account supports up to 5 million contacts. Each contact list supports up to 1 million contacts or a 5 MB file size limit.
How does campaign priority work?
Priority determines the proportion of contacts dialed across concurrent campaigns. A higher priority value means a greater percentage of contacts are dialed for that campaign.
Priority Percentage = (Campaign Priority Value ÷ Sum of All Priority Values) × 100
| Scenario | Campaign | Priority | Percentage |
|---|
| Two campaigns | Campaign 1 | 5 | 62.5% |
| Campaign 2 | 3 | 37.5% |
| Equal priority | Campaign 1 | 5 | 50% |
| Campaign 2 | 5 | 50% |
Related
