
Accessing Scheduled Agents
- Log in to your Platform account.
- Navigate to the Agents and Flows section to view all available agents.
- Open an individual agent to access its scheduler settings.

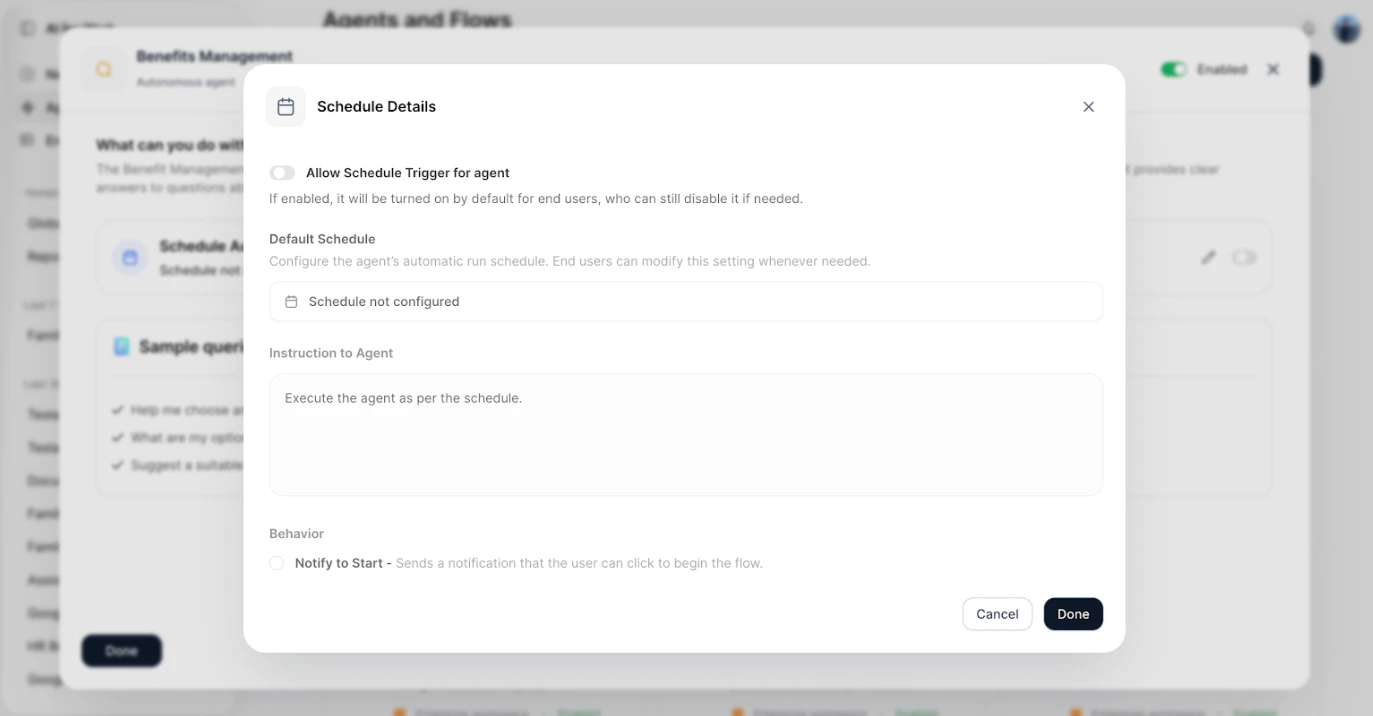
Configuring a Scheduler
Open an individual agent to access its dedicated scheduler settings panel.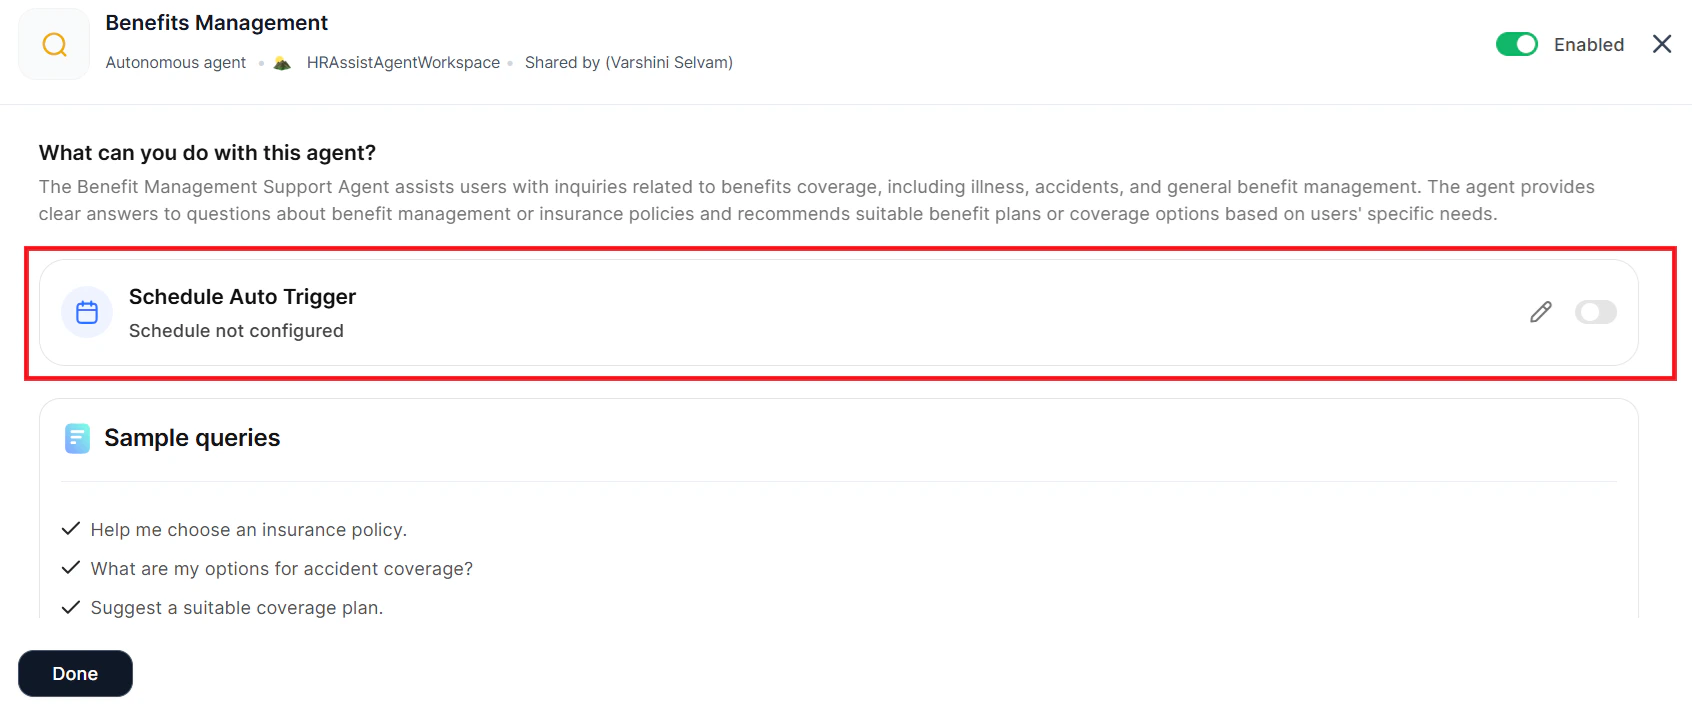
- Allow Schedule Trigger for Agent — Enable or disable scheduling for this agent.
- Default Schedule — Set the frequency and timing: Once, Hourly, Daily, Weekly, Monthly, Custom, or Cron.
- Instructions to Agent — Define what the agent should execute when the schedule runs.
- Behavior — Configure notifications to control how the system communicates with users about scheduled executions.
Managing All Schedulers
The platform provides a centralized view for managing all schedulers across your agents and workflows. Navigate to the Scheduler Agents section to view, edit, and monitor all configured schedulers in one location.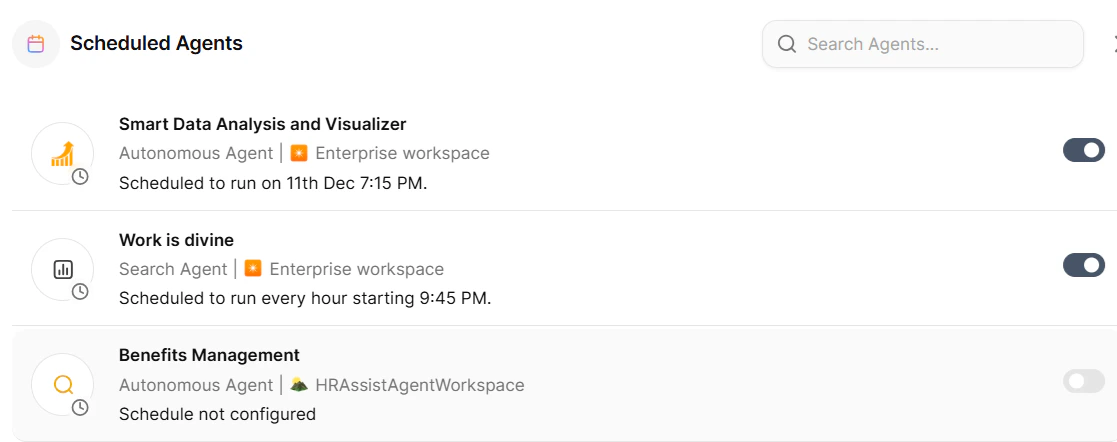
- Review all active and inactive schedulers.
- Modify scheduler configurations.
- Monitor scheduler execution history.
- Manage multiple schedulers efficiently.
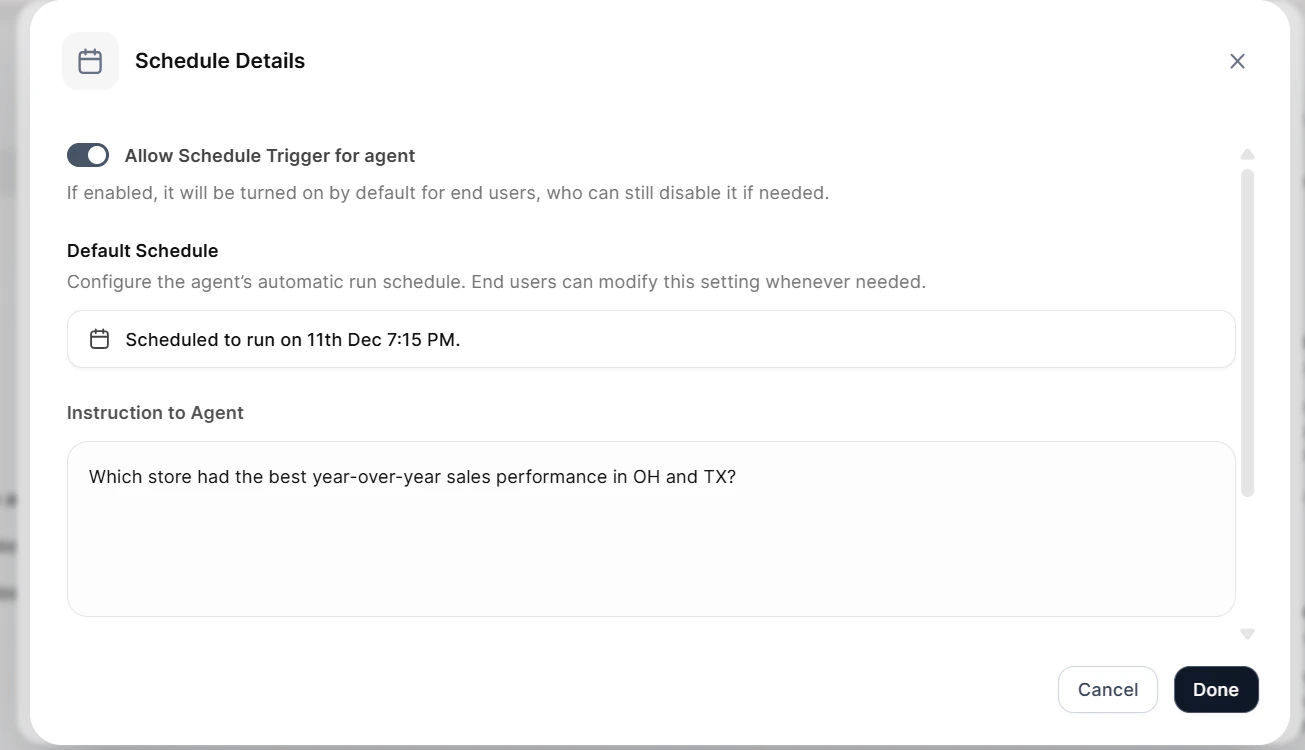
Updating an Existing Schedule
- Select the agent from the Schedule Agents list.
-
The agent’s scheduling details panel opens.
-
Modify any of the following settings:
- Schedule trigger status (enable/disable)
- Schedule frequency and timing
- Agent instructions
- Notification preferences
- Save your changes.