
Pre-Built API Agents
- Zendesk - It helps us to fetch Zendesk tickets based on entities.
- Slack - It helps us to send the response to Slack channels and threads.
- Microsoft 365 Calendar - It helps us to create calendar events, fetch calendar events based on filters, check colleagues’ availability, and send quick messages in case of a delay in joining the meeting.
- Microsoft 365 Email - It can get emails based on user queries fetching entities, send responses as emails, set individual emails as context, and ask for follow-ups.
- Microsoft OneDrive - It can fetch files based on user queries and filters, set individual files as context, and ask followup questions.
- Microsoft Teams - It can fetch files based on user queries and filters, set individual files as context, and ask follow-up questions.
- Jira - It can retrieve issues based on user queries using entity filters and effortlessly create Jira issues using AI intelligence derived from action items.
- HubSpot - It helps in pulling deals based on user queries.
- Google Calendar - It can create calendar events, fetch the events based on filters, check colleagues’ availability, and send quick messages in case of a delay in joining meetings.
- Google Mail - It can get emails based on user queries fetching entities, send responses as emails, set individual emails as context, and ask for follow-ups.
- Google Drive - It can fetch files based on user queries and filters, set individual files as context, and ask follow-up questions.
Publish a Pre-Built Agent
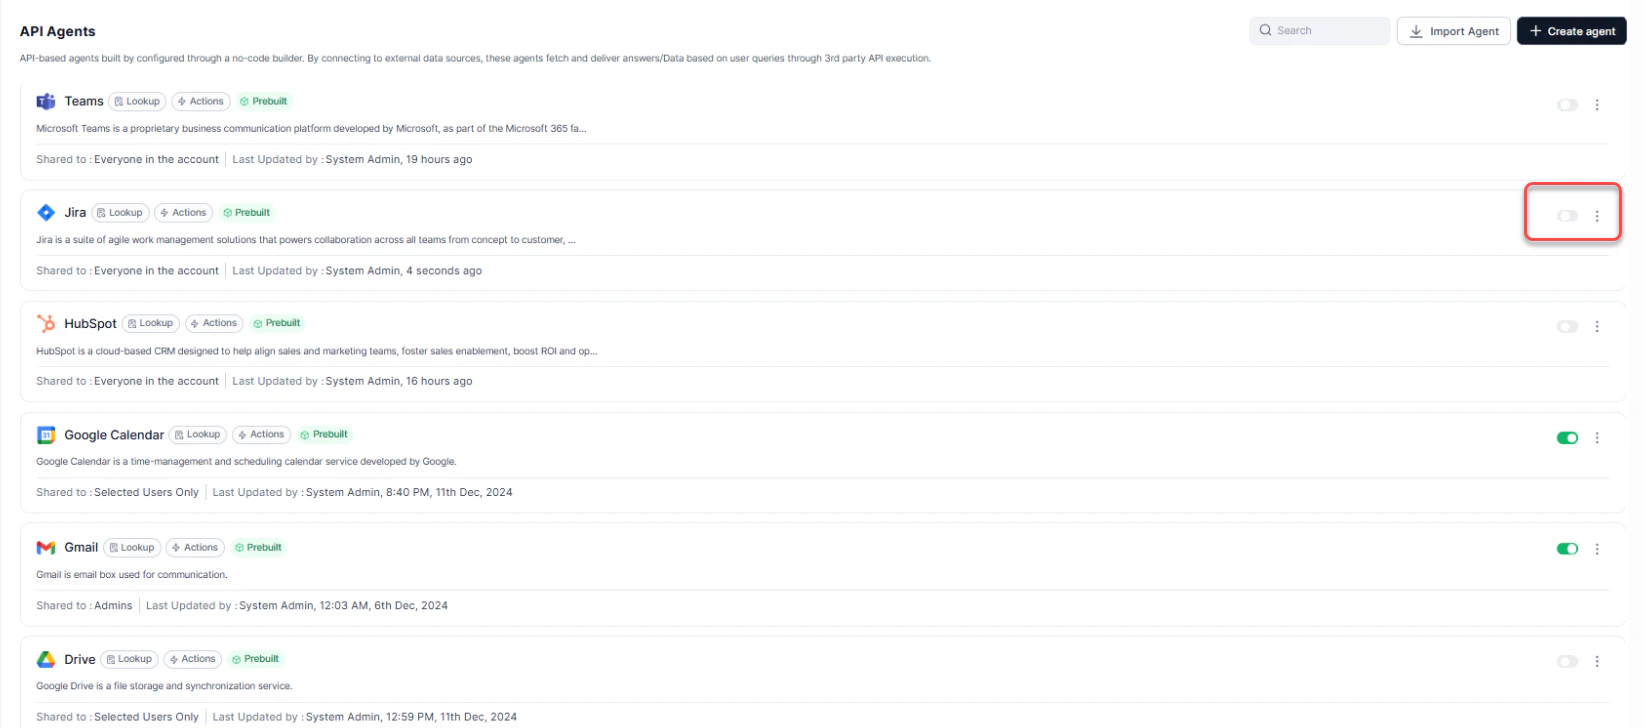
Administrators can publish the selected pre-built agents to be available for their users via the Agent Store. Steps to publish a pre-built agent:- Navigate to User Profile > Admin Console > AI Search or AI Agents > API Agents or Prompt Agents. You’ll see a list of Pre-Built Agents, each marked with a “Prebuilt” label.
-
To enable the Agent, Toggle the switch ON or click the ellipsis next to the specific agent. A pop-up window is displayed.
-
Provide the following details:
- Published Version: Select the version of the agent you are publishing.
-
Publish to: Choose who will have access to the agent:
- Admins: Restrict the agent to Admin users only.
- Selected User groups/Users: Specify individual users or groups.
- Everyone in the Account: Make the agent available to all users.
-
Actions: Choose what users can do with this agent:
- Lookup: Users can search for existing items.
- Creation: Users can create new items.
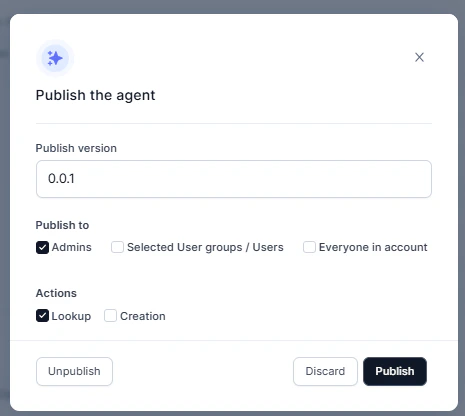
- Click Publish. The agent is now available for the users to use in the Agent Store.